Learn the Basics of Two-Zone Grilling: Six Steps To Indirect Grilling
Mar 19, 2020, Updated Dec 21, 2024
This post may contain affiliate links. Read more at our disclosure policy.

Two-Zone Grilling is the method we use most often to achieve a perfect crust and juicy meat every time. No matter what type of grill you are using, this method of indirect grilling will be the most versatile technique to master. We recommend this cooking method for thicker steaks, chicken, and pork chops.

You can see more basic techniques at our How to Grill resource page.
Have you ever thrown a burger on the grill, or tried to get grilled chicken to come out tender, only to be thwarted by the flame with a burnt exterior and undercooked interior?
This is one of the challenges when learning to use a charcoal grill. Often, the charcoal, or heat source, is set up for direct grilling over the flame, and you have nowhere to move the protein as you cook to avoid the exterior from burning.
The answer lies in understanding the two-zone (or indirect method) of cooking, which allows you to have a direct heat source for searing and then an indirect heat source to finish your meat.
Table of Contents
Heat – What is Direct vs. Indirect Grilling?
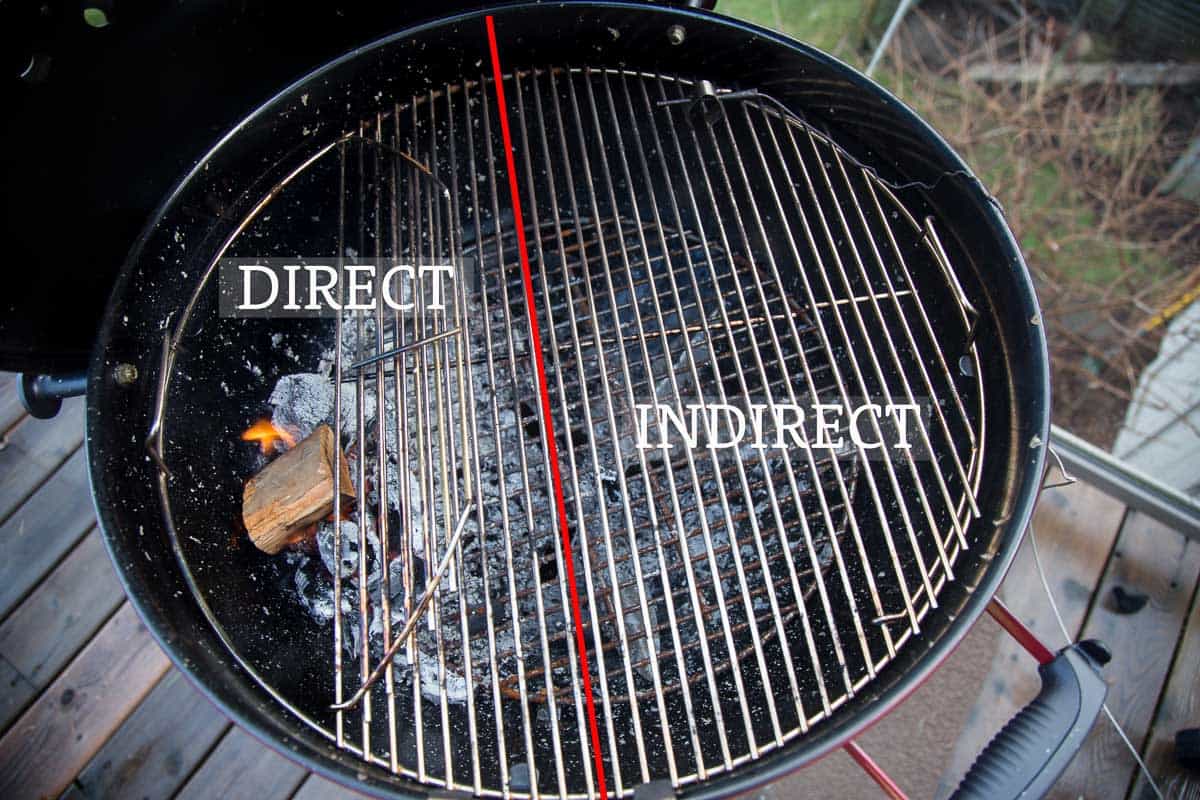
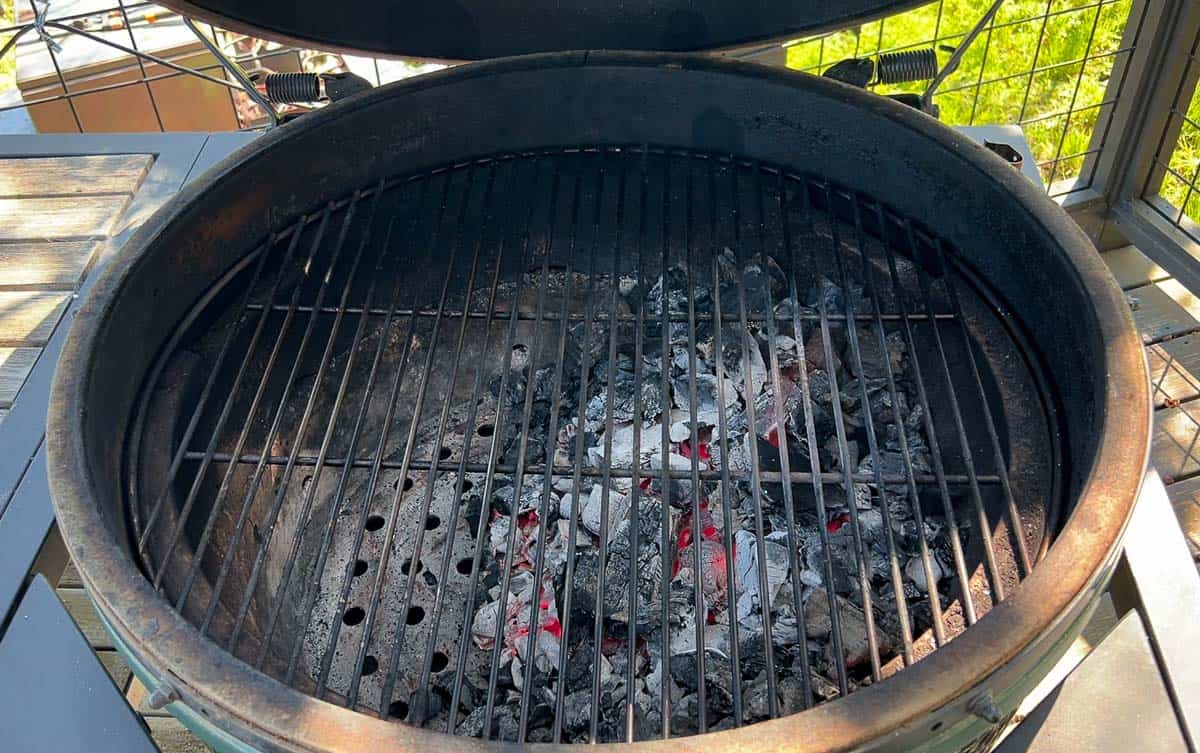
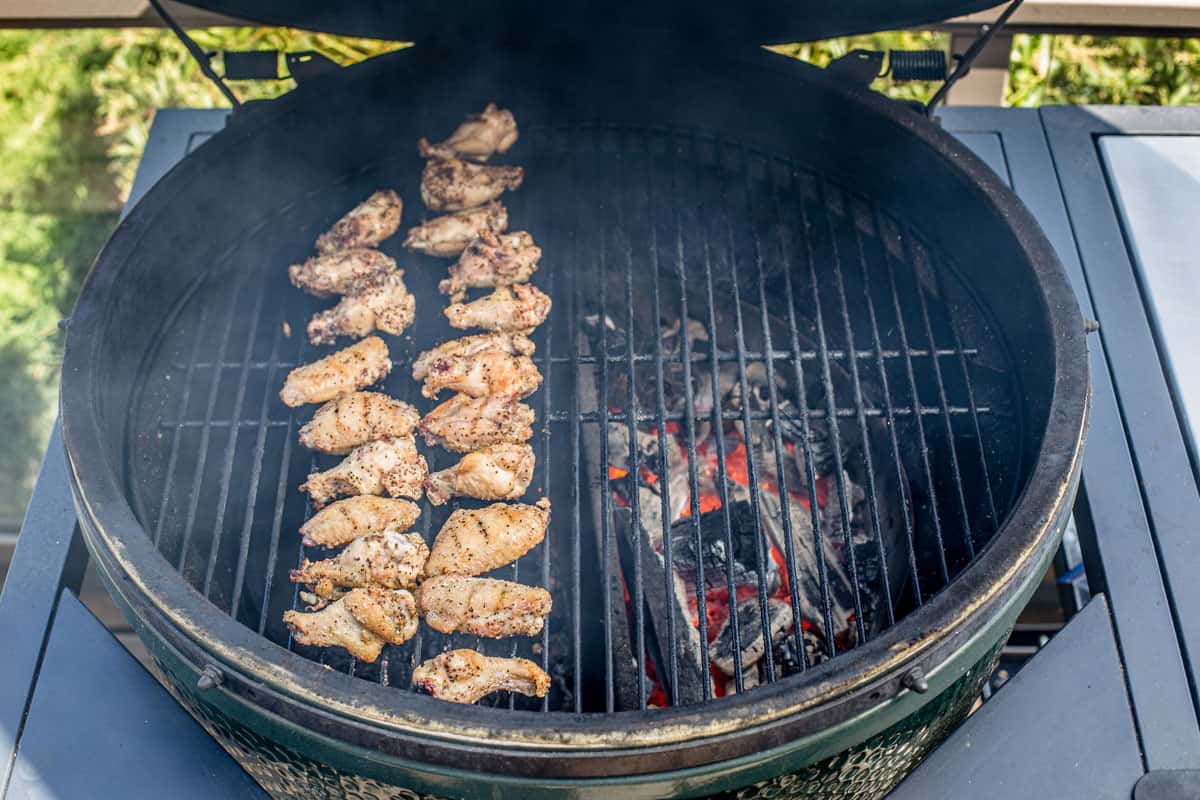
Two-Zone set up on a kettle grill with briquettes. The left side is the hot (or direct) side, while the right side is the cool (or indirect) side.
What is Direct Heat
Direct Heat is when the heat source is directly under the food being grilled. Direct Heat is the setup used for direct grilling, where you manage a high-heat flame for searing or browning. This is how you achieve the browning or Maillard Reaction.
Vegetables, grilled seafood, thin steaks, and pork tenderloin work well using this direct method. The lack of fat helps to avoid the dreaded flare-up and lean cuts of almost anything cook up quickly. So you can get a beautiful exterior and strive for a medium rare interior. And on vegetables, I love a nice crispy texture with flavor, not something that folds over on itself.
What is Indirect Heat
Indirect heat is when the heat source is not directly under the item cooking on the grill. This can mean the charcoal is located to one side, or the cooking chamber is separated from the heat chamber like an offset smoker or a pellet grill.
Indirect heat is one of the principles of smoking meat or low and slow cooking (cooking under 300 degrees Fahrenheit).
What Is Two-Zone Grilling?
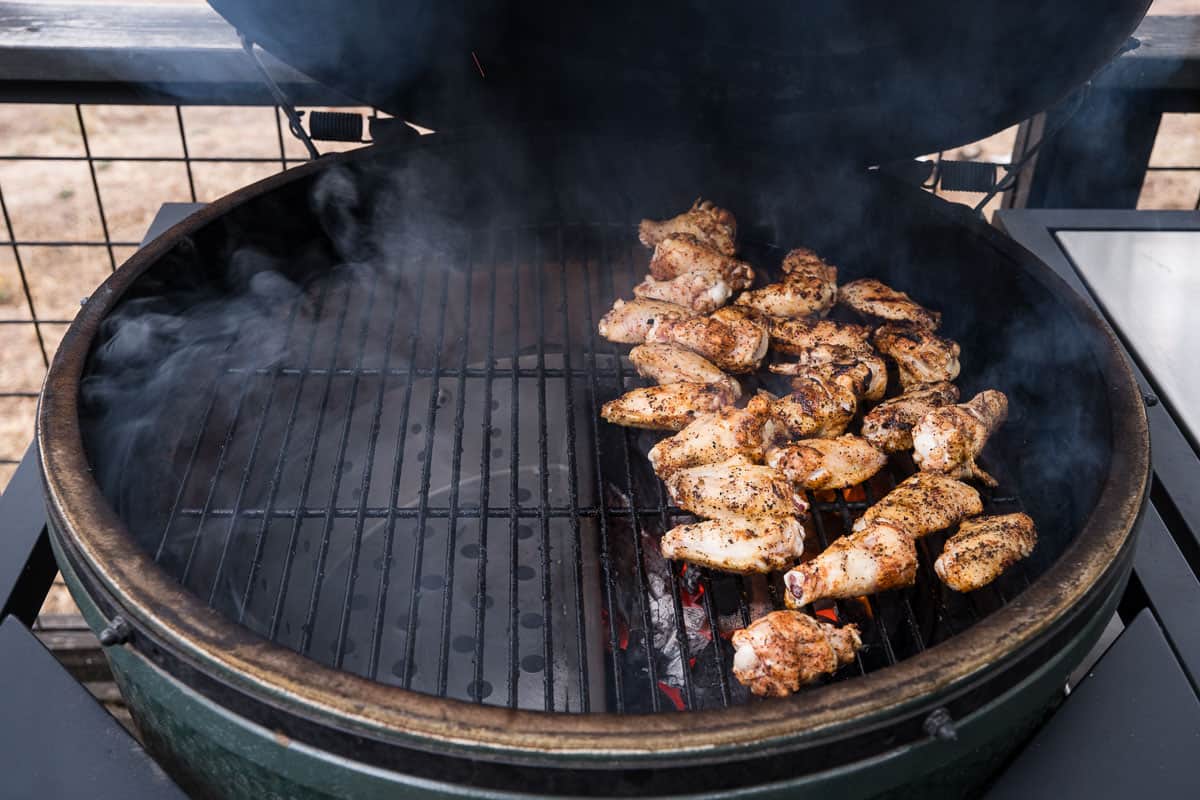
Two-zone grilling is when you combine the direct and indirect methods to grill perfectly. Simply set up the grill whereby you have the heat source on one side of the grill, and the cooler side on the other. This is especially effective on a kettle-style grill or kamado grill without a heat deflector plate.
This allows the perfect sear over a direct heat and then move to indirect heat to finish.
Using this method also allows you to move the meat back and forth to get the right crust and finished temperature. This technique is also great when using a gas grill.
Recommended Tools
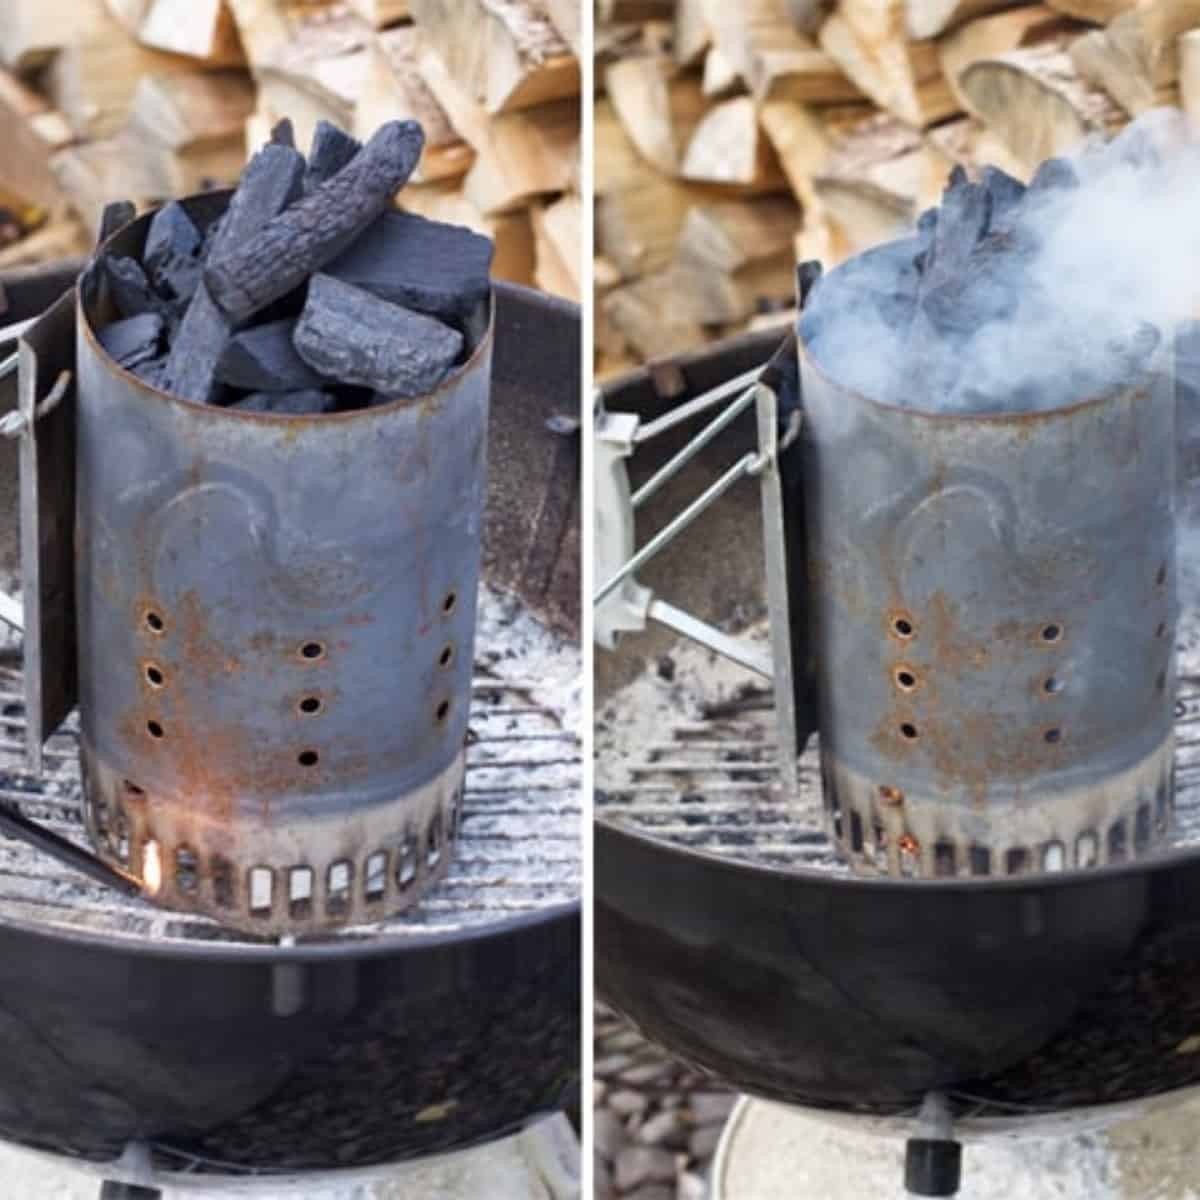
- A charcoal chimney starter makes easy work of a hot coal bed.
- A good quality instant read thermometer like a Thermoworks Thermapen One is a critical investment. It will help determine when your meat is done and at the perfect temperature.
- High-heat welding gloves help in handling the chimney starter, and hot grates, and will be an important tool in your arsenal.
- Long Tongs make it easy to move food around and not burn off arm hair.
How To Grill Indirect
Step One: Light Charcoal
Start charcoal in a chimney starter or review the steps for how to use a chimney starter.
Step Two: Place Charcoal On One Side
When charcoal is completely lit, pour into one side of the grill. This will set up the two zones. Use long tongs to make sure the charcoal is all on one side. The following image is not lit charcoal but for informational purposes.

Step Three: Place Grates On Grill
Fine-tune the temperature to your desired grilling temperature. We target 450 – 500 degrees F over direct heat for most recipes. This lets the grates get hot in about 10 minutes. You’re then ready to grill.
Step Four: Grill Direct
Now that the grill is at temperature, start by searing the meat over the direct heat following the recipe timeline. Then flip the meat to sear the other side.
Step Five: Grill Indirect
Following the recipe timelines, after you see the color you like on the sear, move the meat to the indirect side and cover grill to finish. Use an instant read thermometer like the Thermoworks Thermapen to pull the meat at your desired temperature.
Step Six: Rest
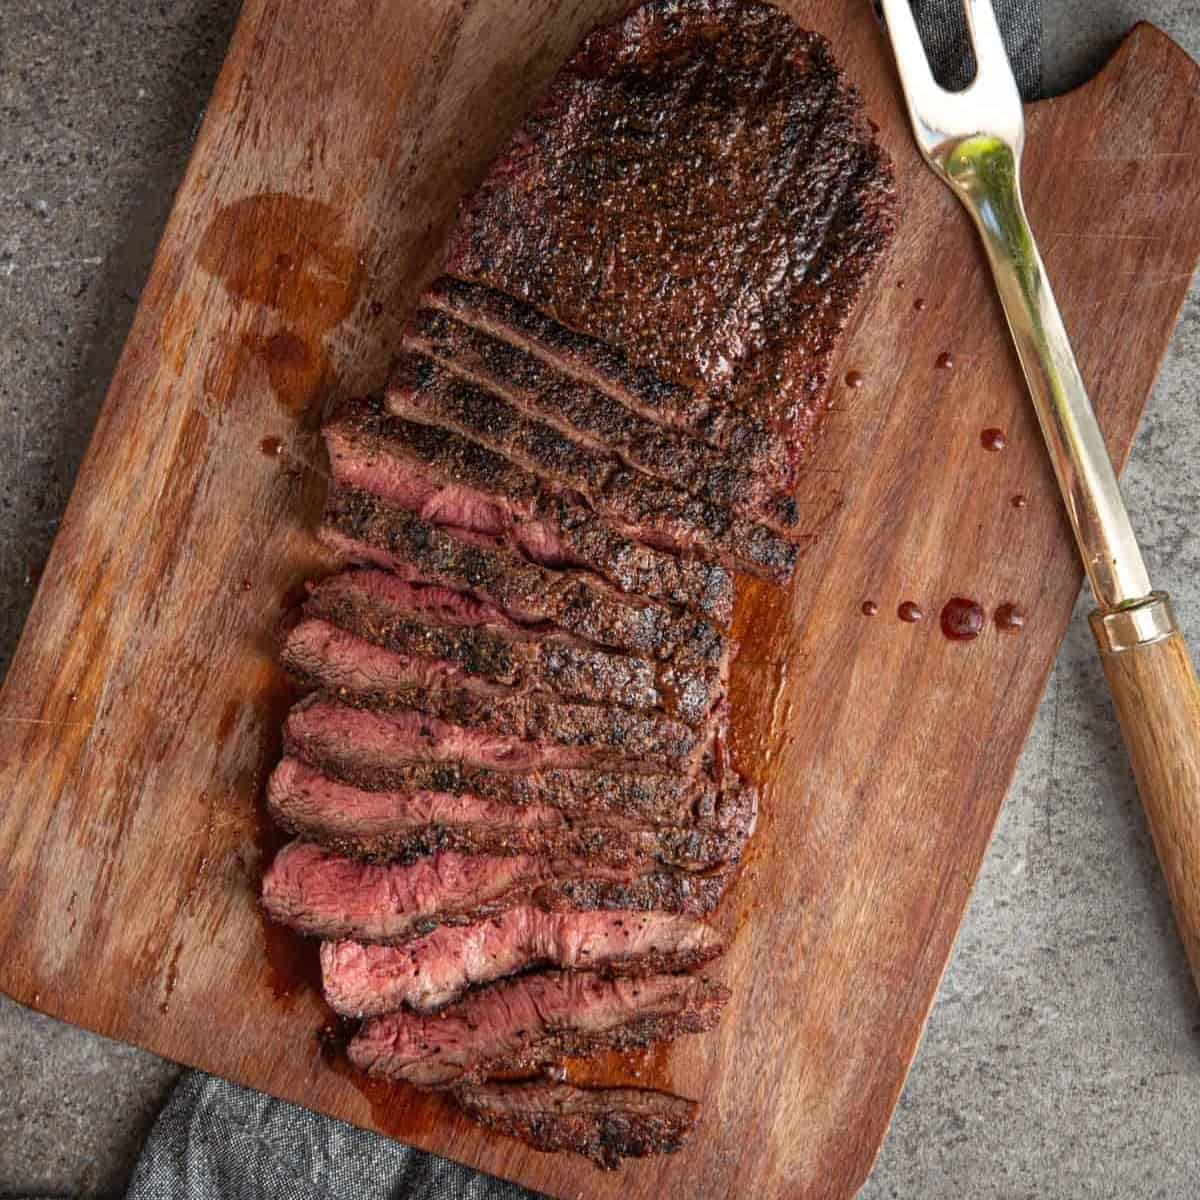
Let any meat rest for 10 – 15 minutes before slicing. Smaller cuts loosely tent with foil.
Two-Zone Grilling on a Gas Grill
For a gas grill, apply the same concept. Start by turning on one or two burners for the sear and then move the item being grilled to a cooler side (with no burners on). I’ve found that even by changing the dials on the gas grill from high to medium or even low, the fact that the meat could sit directly over the flame may cause flare-ups or a little tougher exterior.
There are a number of ways to practice heat management and this is one of the basics. The best advice is to practice – grab some meat and grill it up! Get to know the ins and outs of your grills.
And you can even smoke meat on a gas grill using the two-zone grilling technique.
Grilling Recipes Using Two-Zone Method
A collection of our most popular favorite grilled foods. For even more flavor consider smoking and searing using the “reverse sear method”. We have a great guide on how to reverse sear for some of the best food you will eat.
Tried this recipe? Give us a star rating and we would love to see! Mention @vindulge or use the hashtag #vindulge on all the social media handles. And consider subscribing to our newsletter where we drop all our favorite ideas and inspirations weekly.

Get a signed copy of our cookbook! Order Now


Nice refresher. If your grill has an upper rack, you can place them there as well.