This post may contain affiliate links. Read more at our disclosure policy.


This incredible Gluten Free Pizza Dough is as close to the real thing as we’ve ever tasted! The most important ingredient is the right crust (aka the right flour mix). Using some basic techniques and some time this recipe will help you achieve a soft crust that is chewy and still gets that nice crunchy crust without sacrificing flavor.

Table of Contents
Recipe Highlights
- There is no need to par-bake your pizza using this dough.
- The dough can be frozen for a make ahead gluten free pizza dough.
- You can make this with one flour versus mixing your own from scratch.
- Works great for Neapolitan or NY Style Pizzas.
My kids have been gluten-free for several years now. And when we go out to restaurants we eat the same thing as them. Pizza has become a sad experience. And I never thought we could ever experience the delicious and chewy crust that comes from a classic Neapolitan style pizza dough using gluten-free alternatives.
But there are two restaurants (one in Oregon and one in Utah) that changed all that. How did they achieve such an incredible gluten-free crust? One that had me question whether they actually sent us the gluten-free pizza or made a mistake. After a few phone calls and asking (ok begging) specific questions, they told us their secret. The thing both restaurants had in common was they both used the same imported gluten-free Italian flour.
Ingredients
While the recipe list is small each plays an important role in the ease of making the pizza and the texture when it’s cooking.
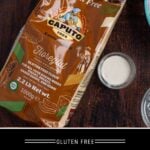
- Gluten-Free Flour – We use Caputo Fioreglut, and strongly recommend it for this dough. You can find it online or in your better grocery stores (call ahead to confirm). This flour is the key to gluten-free pizza success! We have also tested this recipe with Bob’s Red Mill Cup for Cup. See recipe notes for our recommendation if that is all you have.
- Water – Warm water is important to create heat and activate the yeast. Ideally between 90 and 100 degrees Fahrenheit.
- Fresh Active Yeast – We don’t like the instant as it creates too much rise. (also, yeast is gluten-free) If all you have is fast-acting or instant – use half the amount.
- Kosher Salt – Don’t use table salt as it’s too salty.
- Baking Powder – Helps with the rise while the pizza is cooking and supplements the yeast.
- Xanthan Gum – This is important for this specific flour to help with the stretch. If you use a different flour then check and see if there is already xanthan gum in it. Bob’s Red Mill Gluten Free Cup for Cup has xanthan gum.

A note on yeast – One of the biggest reasons people don’t see a rise is using yeast that is expired (or dead). Be sure you use fresh active yeast.
The Best Gluten Free Flour for Making Pizza
When making gluten free pizza it’s important to use a gluten free flour that has the right protein count. Not all flours have that, which is why we do NOT recommend mixing your own flours when there are some out there already made for this.
The protein in the flour is what helps it stick together and not get crumbly. So when making this pizza dough recipe be sure you use a flour that has a good protein level.
- The number one flour we recommend for gluten free pizza dough is Caputo Fioreglut ($18 for 2 kilograms of flour). We have served this to so many people and when tested it is by far the superior dough to replicate the classic flavor and texture. This flour does not contain Xanthan gum (which is why we add it to our mix).
- If you can’t find or don’t want to spend the money on the Caputo then Bob’s Red Mill Baking Flour is the second we’d recommend. The finer grind on this is great for pizza. But seriously, go with the Caputo and taste for yourself the difference.
- Avoid flours that are heavy in almond flour as they tend to just crumble.
Hydration
Hydration is the ratio of water to flour. The reason this is important is to make sure your dough is not too dry or too wet for the type of pizza you want. The same applies to gluten free pizza dough.
We find an 80% hydration level is perfect for gluten free flour to keep the dough wet but not too sticky you can’t work with it. The warm water also helps to get the yeast activated to add those precious air bubbles into your dough through the fermentation process.
Recipe Testing
We have tested this gluten free pizza recipe with various gluten free flours and hydration levels. Here are some notes and feedback from people who have made this recipe. It’s nerdy stuff but important.
Gluten Free Flour: We tested many gluten free flours. The only two we recommend using is the Caputo Fiorelgut (recommended) or the Bob’s Gluten Free Baking Flour. Because of the different milling levels, IF you use the Bob’s Red Mill, we recommend using no more than a 75% hydration level.
Hydration Levels: If you run your ratio of water to flour too dry, there won’t be a substantial rise.
- 67% – The dough was too dry and stiff to work with. We do not recommend anything less than 70% hydration.
- 70% – The dough has some elasticity but will still be slightly dry. This ratio was very good for flatbread style pizzas with a thin crust.
- 75% – The dough has good stretch and has a noticeable rise. You can feel the air pockets. This hydration level is perfect for NY Style pizzas or if you are using Bob’s Red Mill GF flour.
- 80% – This is the ideal hydration level when using the Caputo. Their is substantial rise through fermentation and the dough feels most like a typical wheat flour based dough. Since we are doing two fermentation cycles we use the 80% so that the elasticity and rise continues through the second fermentation.
Fermentation
Not all gluten free recipes have a fermentation process. This one does.
The fermentation or rise process is very important and happens in two stages. The first is to let the entire dough ball rise to get those important air pockets.

The second is to divide the dough into three dough balls and let that occur a second time over a few hours. For a full run down you can see our Neapolitan Pizza Dough recipe. The process is similar, and we’ve discovered necessary for the truly soft dough experience.
That fermentation helps to give the dough it’s bouncy feel and, when cooked, the right texture when eating.
Kneading: Technically there is no gluten being converted so kneading isn’t as important as it would be with traditional flour. The goal is to simply form the dough into uniform balls for the first and second fermentation.
Instructions


- Start by weighing out all your ingredients first. Then, in a large bowl with warm water, add the salt and the yeast. Stir to combine and let sit for 5 minutes. In another bowl combine the flour, xanthan gum, and baking powder.
- After five minutes slowly add in the flour mixture into the water and mix with your hands to combine. It will be slightly sticky. Continue to combine with hands until the dough is formed into a rough ball.
- Place a handful of gluten free flour on a large cutting board. Carefully remove the pizza dough and form the dough into one ball using the palm of your hands to press on the dough and then fold it in half and press again to form.
- Place the dough into a bowl and cover with a towel. Allow to ferment for 30 minutes as the yeast activates.
- Then after 30 minutes, remove the dough from the bowl and place it on a floured cutting board. Press the dough again with the palms of your hands to knead it and form back into a smooth dough ball. Place back in the bowl or a lightly oiled container. Cover and then let it rise for 2 hours.
- After 2 hours remove the dough from container and weigh. Divide the number on the scale by 3 and shape into 3 equal dough balls. Form them with your hands similar to kneading earlier. In this case we had one dough ball at 880 grams which we separated into 3 dough balls that weighed roughly 293 grams each.
- Place gluten free pizza dough onto a sheet tray or dough rise container, lightly flour the top of the balls and cover with plastic wrap. Let sit for 3 hours for the second fermentation.
- After 3-hours it’s time to roll out the dough for your favorite pizza. We recommend at least 2 hours for the second fermentation and no more than 4.
Important Tip: You need to keep the dough covered while it’s fermenting! If you don’t then the outer portion of the dough will develop a hard crust that is unpleasant to form and creates texture issues.
Equipment
If you plan to make a lot of pizza (or bake in general) then you need a great digital scale.

While you can mix in a good blender we recommend this done by hand in a large bowl. For the fermentation you can use the bowl and transfer to a baking sheet or dough proofing container.
Check out our complete guide on essential pizza tools.
Making Ahead
You can make this dough the day prior. Follow the same steps and after the second fermentation wrap in plastic wrap and store in the refrigerator. Then remove an hour before you will make the pizza to let it come to room temperature.
You can freeze the dough as well by wrapping the dough tightly in plastic wrap and then placing into the freezer before the second fermentation. Follow our tutorial on how to freeze pizza dough.
Then the day prior to using place in the refrigerator to thaw and then remove from the refrigerator one hour prior to making pizza. It will last three months in the freezer.
Making Pizza
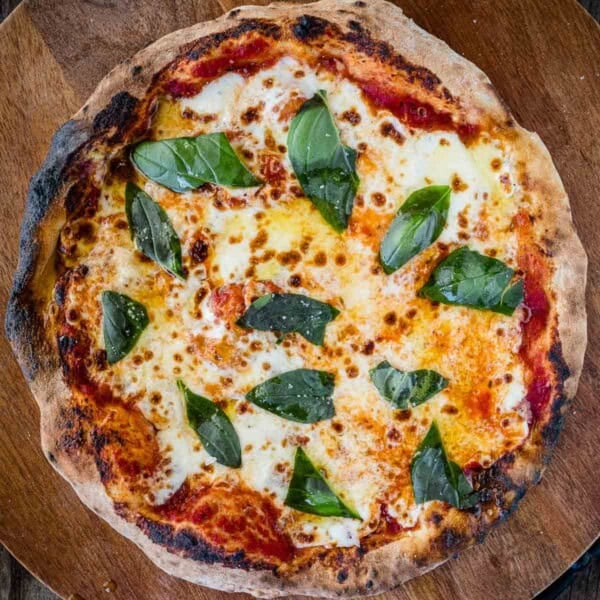
You can use the exact portions of our margherita pizza recipe and substitute this dough.
- Once the fermentation is done the dough is ready for pizza. Unlike a normal (gluten) pizza crust you have to use some finesse when rolling out the dough for a gluten free pizza.
- Place the dough on top of parchment paper and flatten it with the palm of your hand. From there roll it into your desired shape using a rolling pin. The texture will feel somewhat like play dough, so they rolling pin is helpful for this dough. This recipe is for 11 – 12 inch pizzas for one dough. The edges will be rough so use the next step to smooth out and form the crust.
- After the dough is stretched out to your desired width use your fingers to pinch up the sides where you want the crust so that the dough has a ring around it that will rise as it cooks.
- From there transfer the pizza dough onto a well floured pizza peel and then add your desired toppings. Place the gluten free pizza dough round on a pizza stone and bake according to any recipe instructions.

Chef’s Tip: Don’t overload a pizza with ingredients. The more toppings and sauce you add the heavier and more moist the dough becomes making it harder to release the dough from the peel.
Key Tip
The ambient temperature in which the dough rises is important. Try to avoid letting the dough rise in temperatures over 75 degrees Fahrenheit as the dough can overproof.
FAQ + Troubleshooting
If the dough is too sticky add more flour in small increments until it forms into a smooth ball.
If the dough is too dry then add warm water in 1 tablespoon increments until you find the dough forms into a smooth shaped ball.
If you have a pizza stone you do not need to par bake this dough.
Yes and as we noted above the yeast is an important element in creating the texture and air bubbles from the fermentation process.
Recipe Inspirations
Sub this gluten free pizza dough recipe for any of our wheat pizza recipes. We also have an easy gluten free no bake pizza sauce.
- Traditional Margherita Pizza
- Spicy Neapolitan Pizza
- How to Grill Frozen Gluten Free Pizza
- BBQ Chicken Pizza

Gluten Free Pizza Dough Recipe
Equipment
- 1 sheet tray or dough proofing container
- 1 large container for first fermentation
- 1 large bowl for mixing
Ingredients
- 400 grams warm water, (Target between 90 – 100 degrees Fahrenheit)
- 1 pack active dry yeast, About 7 grams
- 12 grams kosher salt
- 500 grams gluten free flour, (For best results use Caputo Fioreglut)
- 12 grams baking powder, (Do not use baking soda)
- 10 grams xanthan gum
Instructions
- Start by weighing out all your ingredients first. Then, in a large bowl with warm water, add the salt and the yeast. Stir to combine and let sit for 5 minutes. In another bowl combine the flour, xanthan gum, and baking powder.
- After five minutes slowly add in the flour mixture into the water and mix with your hands to combine. It will be slightly sticky. Continue to combine with hands until the dough is formed into a rough ball. Cover with a towel and let sit for 30 minutes as yeast activates.
- Place a handful of gluten free flour on a large cutting board. Carefully remove the pizza dough and kneed the dough to form it into one ball for 30 seconds. Use the palm of your hands to press on the dough and then fold it in half and press again. Do this four times and then form into a dough ball.
- Place the gluten free pizza dough into a lightly oiled container and cover. Allow to ferment for two hours. The dough ball will start to rise.
- After 2 hours remove the dough from container and weigh. Divide the number on the scale by 3 and shape into 3 equal dough balls. Form them with your hands similar to kneading earlier. In this case we had one dough ball at 880 grams which we separated into 3 dough balls that weighed roughly 293 grams each.
- Place gluten free pizza dough onto a sheet tray or dough rise container, lightly flour the top of the balls and cover with plastic wrap. Let sit for 3 hours for the second fermentation.
- After 3-hours it’s time to roll out the dough for your favorite pizza. We recommend at least 2 hours for the second fermentation and no more than 4.
Video
Notes
- Once the fermentation is done the dough is ready for pizza. Unlike a normal (gluten) pizza crust you have to use some finesse when rolling out the dough for a gluten free pizza.
- Place the dough on top of parchment paper and flatten it with the palm of your hand. From there roll it into your desired shape using a rolling pin. The texture will feel somewhat like play dough, so they rolling pin is helpful for this dough. This recipe is for 11 – 12 inch pizzas for one dough. The edges will be rough so use the next step to smooth out and form the crust.
- After the dough is stretched out to your desired width use your fingers to pinch up the sides where you want the crust so that the dough has a ring around it that will rise as it cooks.
- From there transfer the pizza dough onto a well floured pizza peel and then add your desired toppings.
Nutrition
Nutrition information is automatically calculated, so should only be used as an approximation.


Best gluten free dough ever! Tried lots of recipes and this one is the best. Kids love it over gluten dough we’ve made before. So fluffy!
So glad you like it! We’ve had lots of success with this recipe 🙂
Cheers
Can this gf pizza dough be frozen?
Yes. We recommend you freeze after the second rise. Then allow to thaw for 24 hours before cooking.
My wife and daughter have health issues with gluten, so we make mostly GF recipes. A few years ago we built a wood fire pizza oven, so we make a LOT of pizzas, even in the deep Wisconsin winter. I’m always on the lookout for new recipes, especially for pizza dough. This recipe makes a lot of sense, in that it makes up for the lack of gluten. I can’t wait to try it. I do have a question – the step where you mix yeast, water, and salt concerns me. I’ve had issues with salt killing off yeast before it can activate, so I always add salt after mixing the flour. Is this a valid concern?
Also, I’ve tried lots of different GF flour, and Caputo is by far the best. No contest.
Mike, great question. We have tried both on GF and regular flour, and the salt in the water has not killed off the yeast. We find it helps minimize over-proofing. You can just mix the salt in with the caputo flour should you wish. The photo you see in the article is with the salt, yeast, and water solution and you can notice that it does have rise/air bubbles.
Hello. At what point can I freeze this?
We recommend freezing after the second fermentation. Then to thaw it, remove from freezer and it will thaw within 24 hours.
Hi there,
I started this recipe too early to dinner tonight. Can I lengthen the 2nd rising/2hr? I know you recommend no more than 4 hours on the final rise.
Yes, you will be fine if you go longer on the second rise. You can even extend the first. The timing is more guidance than a rule.
Thank you so much for the prompt reply. Excited to try taste it.
This has become our go to recipe, we have a coeliac daughter so we all eat gluten free pizza to keep our pizza oven safe for her. We all love this recipe! For some reason I haven’t been brave enough to use 10g of xanthan gum, sticking to half but it still turns out great. Just made a batch up for tea tonight.
This is the best gluten free pizza recipe I have found. Hands down. Period. Definitely make sure you use the Caputo flour but it is absolutely incredible! È delizioso!
Thank you for taking time to share your feedback! We tested a lot of flours, each have their own hydration levels, but the Caputo was definitely our favorite and they did not pay us to say it!
At what stage would you freeze the unused dough balls – before or after the 2nd rise?
We always freeze the dough balls after the second rise. Then we thaw them and for 24 hours and let them come to room temp for 2 hours before making them.
This didn’t come out at all for me – followed the recipe. When I was mixing it it was crumbly and dry – should I add more water as I go along until it’s like a dough? It never rose :/
Hi, I’m sorry to hear it didn’t come out for you. There are a number of reasons for this. The most obvious would be not using the same flour. We’ve tested it with a number of GF flours and the one that we have the most success with is the Caputo Fioreglut. If the dough is too crumbly we suggest to add a little bit of water while you are mixing it, and before the first rise (like 1 tablespoon increments). It’s also crucial to weigh all ingredients (vs using cup measurements). Even a few grams off could make a big difference in the outcome. And finally, making sure your yeast is as fresh as possible, and not expired. Fresh yeast makes a big deal on whether doughs rise. I hope that helps.
Do I bake the pizza with the parchment paper between the dough and pizza stone?
We do not use parchment paper between the dough and the stone nor do we recommend it. We mostly cook it at high temperature where stone is 700 degrees F. So if you are doing this in an oven it’s likely the temp wouldn’t justify the need for parchment paper.