
This post may contain affiliate links. Read more at our disclosure policy.



This incredible Gluten-Free Pizza Dough is as close to the real thing as we’ve ever tasted! The most important ingredient is the right flour mix. Using some basic techniques and some time, this recipe will help you achieve a soft crust that is chewy and still gets that nice crunchy crust without sacrificing flavor. This is the exact recipe featured in our critically acclaimed cookbook, Fire + Wine Backyard Pizza, and I know you’re gonna love it!
If you’ve been disappointed by gluten-free pizza that tastes more like a cracker than pizza, this recipe is for you.

Table of Contents
- Why You’ll Love This Gluten-Free Pizza Dough
- Equipment
- Ingredients
- The Best Gluten-Free Flour for Making Pizza
- Why This Recipe Uses 80% Hydration
- Fermentation
- How to Make Gluten-Free Pizza Dough
- How to Shape Gluten-Free Pizza Dough
- How to Bake Gluten Free Pizza Dough
- Expert Tip
- Making Ahead
- FAQ + Troubleshooting
- What to Make With This Gluten-Free Pizza Dough
- A Note From Our Pizza Kitchen
- Gluten Free Pizza Dough Recipe
Why You’ll Love This Gluten-Free Pizza Dough
- It actually has the texture of pizza. The finished crust is soft and chewy inside with a crisp exterior.
- It’s the same dough we use in our pizza cookbook. This is the gluten-free dough featured in Fire + Wine Backyard Pizza.
- We’ve tested the hydration. We tried multiple hydration levels and found 80% to be the sweet spot when using Caputo Fioreglut flour.
- You don’t need to par-bake it when using a properly heated pizza stone or high-heat pizza oven.
- You can freeze the dough. Make a batch ahead of time and have pizza dough ready whenever pizza night happens.
My kids have been gluten-free for years now, and for a long time pizza night was rough. We’d order out and they’d get a sad, cardboard-tasting crust while everyone else got the real thing.
Then we found two restaurants (one in Oregon, one in Utah) making a gluten-free crust so good it had me double-checking whether they’d actually sent the right pizza. After a few phone calls (okay, some borderline begging), we got their secret: both used the same imported Italian gluten-free flour.
We took that lead and ran with it, testing hydration levels, fermentation times, and flour brands until we landed on the version you see here. It worked so well that it’s the exact gluten-free dough recipe in our cookbook, Fire + Wine Backyard Pizza. This isn’t a simplified web version, it’s the real recipe, tested the same way as every other dough in that book.
Equipment
If you plan to make a lot of pizza (or bake in general), then you need a good digital scale.

While you can mix in a good blender we recommend this done by hand in a large bowl. For the fermentation you can use the bowl and transfer to a baking sheet or dough proofing container.
Check out our complete guide on essential pizza tools.
Ingredients
While the recipe list is small each plays an important role in the ease of making the pizza and the texture when it’s cooking.
- Gluten-Free Flour – We use Caputo Fioreglut, and strongly recommend it for this dough. You can find it online or in your better grocery stores (call ahead to confirm). This flour is the key to gluten-free pizza success! We have also tested this recipe with Bob’s Red Mill Cup for Cup. See recipe notes for our recommendation if that is all you have.
- Water – Use water between 90 and 100 degrees Fahrenheit. Warm water is important to create heat and activate the yeast.
- Fresh Active Yeast – We prefer active dry yeast for this recipe. Fresh yeast is important. If your yeast is old or inactive, your dough won’t rise properly. If you’re using instant or fast-acting yeast instead, use less than the amount listed in the recipe (half the packet).
- Kosher Salt – Don’t use table salt as it’s too salty. We use kosher salt specifically, and Diamond Crystal is our preferred brand.
- Baking Powder – Helps with the rise while the pizza is cooking and supplements the yeast.
- Xanthan Gum – Xanthan gum helps provide structure and stretch in this particular recipe. If you are substituting a different gluten-free flour, check its ingredients first because some gluten-free flour blends already contain xanthan gum or another binder.

A note on yeast – One of the biggest reasons people don’t see a rise is using yeast that is expired (or dead). Be sure you use fresh active yeast.
The Best Gluten-Free Flour for Making Pizza
For this recipe, we strongly recommend Caputo Fioreglut Gluten-Free Flour.
It’s specifically formulated to perform well in applications like pizza and yeast breads, and we’ve found that it gives us the closest texture to traditional pizza dough.
We’ve tested this recipe with several gluten-free flours. The two that have worked best for us are:
- Caputo Fioreglut: Our #1 recommendation. This is the flour this recipe was developed around. It gives the dough the best combination of structure, stretch, and texture. It is also the reason we use a higher hydration level.
- Bob Red Mill Gluten-Free Baking Flour: This is our second choice if you can’t find or don’t want to use Caputo. Because the flour absorbs water differently, we recommend keeping the hydration closer to 75% rather than using the full 80% hydration in the Caputo version.
- What About Other Gluten-Free Flours? You can make pizza with many gluten-free flour blends, but this recipe is not designed to be a universal 1:1 formula for every gluten-free flour. Gluten-free flours vary significantly in their starches, binders, grind, and water absorption. Changing the flour can change the dough dramatically.
- For the most consistent results, use the flour specified in the recipe. But seriously, go with the Caputo and taste for yourself the difference.
- Avoid flours that are heavy in almond flour as they tend to just crumble.
Why This Recipe Uses 80% Hydration
Hydration is the ratio of water to flour. The reason this is important is to make sure your dough is not too dry or too wet for the type of pizza you want. The same applies to gluten free pizza dough.
For example, 80% hydration means 400 grams of water for every 500 grams of flour.
That sounds like a lot of water, and it is. But gluten-free flour behaves differently from traditional wheat flour, and we’ve found that this wetter dough gives us the best finished texture.
We find an 80% hydration level is perfect for gluten-free flour to keep the dough wet but not too sticky you can’t work with it. The warm water also helps to get the yeast activated to add those precious air bubbles into your dough through the fermentation process.
We tested several hydration levels:
- 67%: Too dry and stiff. We don’t recommend going this low.
- 70%: More manageable, but still somewhat dry. This worked well for a thin, flatbread-style pizza.
- 75%: Good stretch and noticeable rise. This is a good option for NY-style pizza and works well with Bob’s Red Mill Gluten Free Baking Flour.
- 80%: Our preferred level when using Caputo Fioreglut. The dough has more rise, better air pockets, and feels much closer to traditional pizza dough. Winner-Winner!
Fermentation
Not all gluten-free recipes have a fermentation process. This one does.
The fermentation or rise process is very important and happens in two stages. The first is to let the entire dough ball rise to get those important air pockets.

The second is to divide the dough into three dough balls and let that occur a second time over a few hours. For a full rundown, you can see our Neapolitan Pizza Dough recipe. The process is similar, and we’ve discovered necessary for the truly soft dough experience.
That fermentation helps to give the dough it’s bouncy feel and, when cooked, the right texture when eating.
Kneading: Technically there is no gluten being converted so kneading isn’t as important as it would be with traditional flour. The goal is to simply form the dough into uniform balls for the first and second fermentation.
How to Make Gluten-Free Pizza Dough


- Weigh Ingredients: Start by weighing out all your ingredients.
- Activate Yeast: In a large bowl with warm water, add the salt and the yeast. Stir to combine and let sit for 5 minutes.
- Mix Dry Ingredients: In a separate bowl, combine the flour, xanthan gum (if using), and baking powder.
- Combine the Dough: After five minutes slowly add the flour mixture to the water and mix with your hands to combine. It will be slightly sticky. Continue to combine with your hands until the dough is formed into a rough ball.
- First Rest: 30 Minutes: Place the dough into a lightly oiled bowl or container and cover with a towel. Allow to rest for 30 minutes to allow the yeast to activate.
- First Fermentation (2 Hours): After the initial 30-minute rest, remove the dough from the bowl and place it on a floured cutting board. Press the dough again with the palms of your hands to knead it and form it back into a smooth dough ball. Place it back in the bowl or a lightly oiled container. Cover tightly, and then let it rise for 2 hours.
- Divide Into Dough Balls: After the first fermentation, remove the dough from the container and weigh it. Divide the total weight by three and portion the dough into three equal pieces. For example, if your finished dough weighs approximately 900 grams, each dough ball will be around 300 grams. Form each portion into a smooth ball.
- Second Fermentation (2-4 hours): Place the dough balls on a sheet pan or in a dough-proofing container. Lightly flour the top of the balls and cover with plastic wrap (or lid). Let sit for at least 2 hours and up to 4 hours for the second fermentation. We typically aim for 3 hours.
Important Tip: You need to keep the dough covered while it’s fermenting! If you don’t then the outer portion of the dough will develop a hard crust that is unpleasant to form and creates texture issues.
How to Shape Gluten-Free Pizza Dough
This is where gluten-free pizza dough behaves differently from traditional pizza dough.
Would you like to save this?
Don’t expect to pick it up and stretch it over your knuckles like a traditional Neapolitan dough. It requires a little more finesse when rolling out this gluten-free pizza dough.
- Place the dough on top of parchment paper and, working from the center out, flatten it with the palm of your hand, within 1″ of the rim, gently protecting the rim. DON’T ROLL OUT THE RIM (it will rise as it cooks). From there, roll it into your desired shape using your hands. The texture will feel somewhat like Play-Doh, so think about that as you roll out this dough. This recipe is for 11 – 12 inch pizzas for one dough.
- After the dough is stretched out to your desired width, use your fingers to pinch up the sides where you want the crust so that the dough has a ring around it that will rise as it cooks.
- From there, transfer the pizza dough onto a well-floured pizza peel and then add your desired toppings, leaving a 1″ rim. Place the gluten-free pizza dough round on a pizza stone and bake according to the recipe instructions.
How to Bake Gluten Free Pizza Dough
This dough works particularly well in a high-heat outdoor pizza oven, but you can also bake it using a pizza stone or steel in a conventional oven.
Pizza Oven
- For a high-heat pizza oven, preheat the stone thoroughly before launching your pizza.
- Once your pizza is shaped, add a moderate amount of sauce and toppings.
- Transfer the pizza to a well-floured peel and launch onto the hot stone.
- Cook until the crust is puffed and browned and the toppings are fully cooked.
- Rotate as needed for even cooking.
- Because pizza ovens vary significantly in their heat output and stone temperature, use your oven’s normal pizza-baking temperature as your guide.
Conventional Oven
- For a conventional oven, get your oven to its highest temperature with a pizza stone or steel in the center of the oven (my oven gets to 550 degrees Fahrenheit, for example).
- The goal is to get the cooking surface as hot as possible before the pizza goes onto it.
- Shape the dough on parchment, add your toppings, and transfer it to the preheated surface.
- The exact baking time will depend on your oven, stone or steel, and how thick you make the crust.

Chef’s Tip: Don’t overload a pizza with ingredients. The more toppings and sauce you add the heavier and more moist the dough becomes making it harder to release the dough from the peel.
On Using Parchment Paper: This is NOT necessary. But many feel comfortable using it if they are not confident about sliding a pizza onto a stone. If using a HOT pizza oven with a stone at 700 degrees, do NOT use parchment paper.
Expert Tip
The ambient temperature in which the dough rises is important. Try to avoid letting the dough rise in temperatures over 75 degrees Fahrenheit as the dough can overproof.
Making Ahead
You can make this dough the day prior. Follow the same steps and after the second fermentation wrap in plastic wrap and store in the refrigerator. Then remove an hour before you will make the pizza to let it come to room temperature.
You can freeze the dough as well by wrapping the dough tightly in plastic wrap and then placing into the freezer before the second fermentation. Follow our tutorial on how to freeze pizza dough.
Then the day prior to using place in the refrigerator to thaw and then remove from the refrigerator one hour prior to making pizza. It will last three months in the freezer.
FAQ + Troubleshooting
If the dough is too sticky when trying to shape it, add more flour in small increments until it forms into a smooth ball.
If the dough is too dry then add warm water in 1 tablespoon increments until you find the dough forms into a smooth shaped ball.
No, not when using a properly heated pizza stone or pizza oven. We shape the dough, add toppings, and bake it directly. If your launching skills aren’t perfected, then by all means par-bake the dough for 1-2 minutes (no longer!). Then remove, add toppings, then place it back in the oven to cook.
Yes, and as we noted above, the yeast is an important element in creating the texture and air bubbles from the fermentation process.
The most common culprit is yeast. Make sure your yeast is fresh and active.
Temperature also matters. A very cold environment will slow fermentation, while an overly warm environment can cause the dough to overproof.
Make sure the peel is properly floured before placing the dough on it. Work quickly once the dough is on the peel because sauce and toppings add moisture. And don’t overload the pizza!!! Before launching, give the peel a gentle shimmy shake. The pizza should move freely.
Make sure your cooking surface is hot enough and that the pizza isn’t overloaded with wet toppings. Gluten-free dough can also take a little longer to brown, depending on the flour and oven you’re using. This flour doesn’t brown the same way a gluten flour does. If you brush the rim with olive oil it helps to get a little more browning on the crust.
Caputo identifies this flour as gluten-free and states that its gluten-free wheat starch meets FDA requirements for gluten-free products. However, always check the current product label and take appropriate steps to prevent cross-contact in your kitchen.
What to Make With This Gluten-Free Pizza Dough
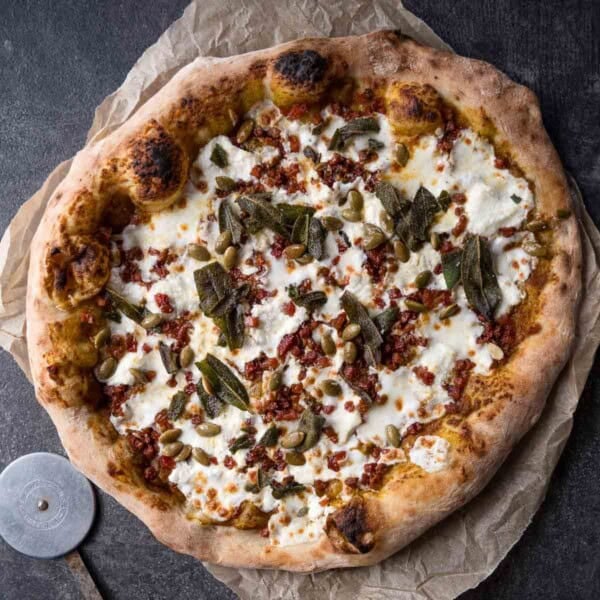
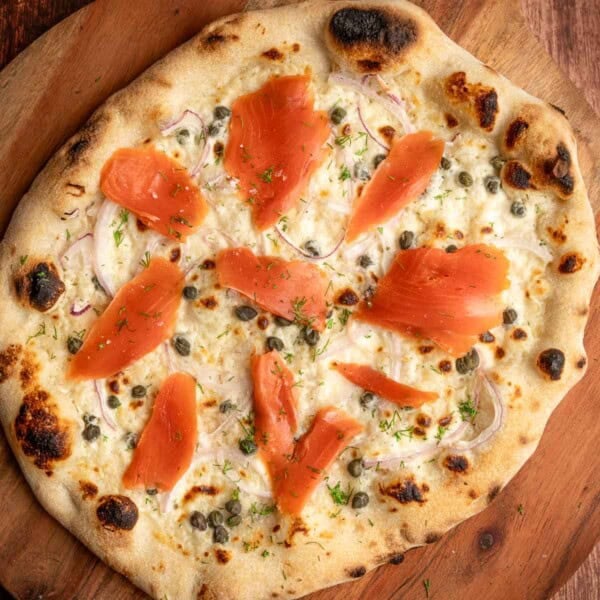
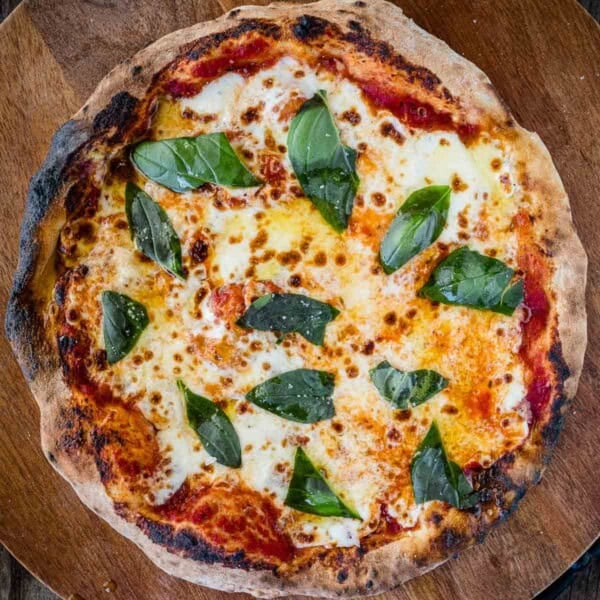
Sub this gluten-free pizza dough recipe for any of our wheat pizza recipes. We also have an easy gluten-free no bake pizza sauce.
- Traditional Margherita Pizza
- Spicy Neapolitan Pizza
- How to Grill Frozen Gluten Free Pizza
- BBQ Chicken Pizza
A Note From Our Pizza Kitchen
We’ve made a lot of pizza.
Between recipe development, pizza-oven testing, cooking demos, events, and writing Fire + Wine Backyard Pizza, we’ve had plenty of opportunities to test what actually works.
And the biggest lesson we’ve learned is this: Great pizza starts with great dough.
You don’t need the fanciest pizza oven to make good pizza. But you do need to understand your dough, your flour, your fermentation, and your cooking surface.
This gluten-free dough is the one we keep coming back to because it gives us the texture we’re looking for without feeling like a compromise.

available now!
Fire + Wine Backyard Pizza
Elevate your backyard pizza game in your grill or pizza oven with techniques and recipes for perfect outdoor pizza. The book also includes wine pairing inspirations for each recipes.
About Vindulge
Mary (a certified sommelier and recipe developer) and Sean (backyard pitmaster) are co-authors of the critically acclaimed cookbooks — Fire + Wine and Fire + Wine Backyard Pizza — and have been creating content for the IACP-nominated website Vindulge since 2009. They live in Oregon on a farm just outside Portland.

Gluten Free Pizza Dough Recipe
Equipment
- 1 sheet tray or dough proofing container
- 1 large container for first fermentation
- 1 large bowl for mixing
Ingredients
- 400 grams warm water, (Target between 90 – 100 degrees Fahrenheit)
- 1 pack active dry yeast, About 7 grams
- 12 grams kosher salt
- 500 grams gluten free flour, (For best results use Caputo Fioreglut)
- 12 grams baking powder, (Do not use baking soda)
- 10 grams xanthan gum, (use only if your flour does NOT contain xanthan gum)
Instructions
- Weigh Ingredients: Start by weighing out all your ingredients.
- Activate Yeast: In a large bowl with warm water, add the salt and the yeast. Stir to combine and let sit for 5 minutes.
- Mix Dry Ingredients: In a separate bowl, combine the flour, xanthan gum (if using), and baking powder.
- Combine the Dough: After five minutes slowly add the flour mixture to the water and mix with your hands to combine. It will be sticky (this is normal!). Continue to combine with your hands until the dough is formed into a rough ball.
- First Rest: 30 Minutes: Cover the bowl with a towel and allow to rest for 30 minutes to allow the yeast to activate.
- First Fermentation (2 Hours): After the initial 30-minute rest, remove the dough from the bowl and place it on a floured cutting board. Press the dough again with the palms of your hands to knead it and form it back into a smooth dough ball. Do this four times and then form into a dough ball (it should take roughly 30 seconds total).Place it back in the bowl or a lightly oiled container. Cover tightly, and then let it rise for 2 hours.
- Divide Into Dough Balls: After the first fermentation, remove the dough from the container and weigh it. Divide the total weight by three and portion the dough into three equal pieces. For example, if your finished dough weighs approximately 900 grams, each dough ball will be around 300 grams. Form each portion into a smooth ball with your hands, similar to kneading earlier.
- Second Fermentation (2-4 hours): Place the dough balls on a sheet pan or in a dough-proofing container. Lightly flour the top of the balls and cover with plastic wrap (or lid). Let sit for at least 2 hours and up to 4 hours for the second fermentation. We typically aim for 3 hours.
- Make Pizza: After 3 hours, it’s time to roll out the dough for your favorite pizza. (see notes for rolling out the dough)
Video
Notes
- Place the dough on top of parchment paper or a smooth surface, and, starting from the center, work outward, flattening it with your fingers or the palm of your hand, leaving 1″ for the rim and gently protecting the rim. DON’T ROLL OUT THE RIM (it will rise as it cooks). From there, roll it into your desired shape using your hands. The texture will feel somewhat like Play-Doh, so think about that as you roll out this dough. This recipe is for 11–12–inch pizzas for one dough.
- After the dough is stretched out to your desired width, use your fingers to pinch up the sides where you want the crust so that the dough has a ring around it that will rise as it cooks.
- From there, transfer the pizza dough onto a well-floured pizza peel and then add your desired toppings, leaving a 1″ rim. Place the gluten-free pizza dough round on a pizza stone and bake according to the recipe instructions.
Nutrition
Nutrition information is automatically calculated, so should only be used as an approximation.


















Best gluten free dough ever! Tried lots of recipes and this one is the best. Kids love it over gluten dough we’ve made before. So fluffy!
So glad you like it! We’ve had lots of success with this recipe 🙂
Cheers
Can this gf pizza dough be frozen?
Yes. We recommend you freeze after the second rise. Then allow to thaw for 24 hours before cooking.
My wife and daughter have health issues with gluten, so we make mostly GF recipes. A few years ago we built a wood fire pizza oven, so we make a LOT of pizzas, even in the deep Wisconsin winter. I’m always on the lookout for new recipes, especially for pizza dough. This recipe makes a lot of sense, in that it makes up for the lack of gluten. I can’t wait to try it. I do have a question – the step where you mix yeast, water, and salt concerns me. I’ve had issues with salt killing off yeast before it can activate, so I always add salt after mixing the flour. Is this a valid concern?
Also, I’ve tried lots of different GF flour, and Caputo is by far the best. No contest.
Mike, great question. We have tried both on GF and regular flour, and the salt in the water has not killed off the yeast. We find it helps minimize over-proofing. You can just mix the salt in with the caputo flour should you wish. The photo you see in the article is with the salt, yeast, and water solution and you can notice that it does have rise/air bubbles.
Hello. At what point can I freeze this?
We recommend freezing after the second fermentation. Then to thaw it, remove from freezer and it will thaw within 24 hours.
Hi there,
I started this recipe too early to dinner tonight. Can I lengthen the 2nd rising/2hr? I know you recommend no more than 4 hours on the final rise.
Yes, you will be fine if you go longer on the second rise. You can even extend the first. The timing is more guidance than a rule.
Thank you so much for the prompt reply. Excited to try taste it.
This has become our go to recipe, we have a coeliac daughter so we all eat gluten free pizza to keep our pizza oven safe for her. We all love this recipe! For some reason I haven’t been brave enough to use 10g of xanthan gum, sticking to half but it still turns out great. Just made a batch up for tea tonight.
This is the best gluten free pizza recipe I have found. Hands down. Period. Definitely make sure you use the Caputo flour but it is absolutely incredible! È delizioso!
Thank you for taking time to share your feedback! We tested a lot of flours, each have their own hydration levels, but the Caputo was definitely our favorite and they did not pay us to say it!
At what stage would you freeze the unused dough balls – before or after the 2nd rise?
We always freeze the dough balls after the second rise. Then we thaw them and for 24 hours and let them come to room temp for 2 hours before making them.
This didn’t come out at all for me – followed the recipe. When I was mixing it it was crumbly and dry – should I add more water as I go along until it’s like a dough? It never rose :/
Hi, I’m sorry to hear it didn’t come out for you. There are a number of reasons for this. The most obvious would be not using the same flour. We’ve tested it with a number of GF flours and the one that we have the most success with is the Caputo Fioreglut. If the dough is too crumbly we suggest to add a little bit of water while you are mixing it, and before the first rise (like 1 tablespoon increments). It’s also crucial to weigh all ingredients (vs using cup measurements). Even a few grams off could make a big difference in the outcome. And finally, making sure your yeast is as fresh as possible, and not expired. Fresh yeast makes a big deal on whether doughs rise. I hope that helps.
Do I bake the pizza with the parchment paper between the dough and pizza stone?
We do not use parchment paper between the dough and the stone nor do we recommend it. We mostly cook it at high temperature where stone is 700 degrees F. So if you are doing this in an oven it’s likely the temp wouldn’t justify the need for parchment paper.