How To Get Perfect Crispy Skin On Smoked Turkey
Nov 08, 2023, Updated Nov 16, 2023
This post may contain affiliate links. Read more at our disclosure policy.
Creating a perfect smoked turkey with crispy skin and flavorful meat is an art, particularly during the holiday season. Whether it’s your first time preparing a Thanksgiving turkey or you’re looking to perfect your smoked turkey technique, mastering the balance between moisture and heat is essential.
We will guide you through the best way to achieve that enviable crispy turkey skin without compromising the tender meat, using a pellet grill or charcoal grill.
Table of Contents
Understanding the Science of Crispy Skin
Before diving into the methods, it’s crucial to understand the science behind crispy skin on poultry. Turkey skin contains fat and collagen, which require higher temperatures to render into the crispiness we desire.

This is easily achieved when roasting your turkey in an oven. However, the smoking process tends to use lower temperatures, which can leave the skin rubbery instead of crispy. Balancing the following steps with some science and heat management is key to achieve crispy skin.
Tools
You need to have a few tools in advance for the best results.
- Brining Container – A large stock pot is perfect for brining. Ideally a 16-quart. If brining multiple turkeys then consider using a cooler. If using a cooler you need to continually add ice so it stays at a safe temperature (mimicking the temperature you would have in a refrigerator).
- Bluetooth Thermometer – A leave-in style Bluetooth thermometer, like the Thermoworks Smoke Unit or the Meater+ are really critical to have so you can monitor the internal temperature of the turkey as it is smoking.
- Instant Read Thermometer – While the leave-in thermometer helps with gauging the internal temperature of the turkey you still need to probe the entire turkey at the thickest parts to make sure it reaches a safe internal temperature (in multiple places). We use the Thermoworks Thermapen One.
- Large Cutting Board – Both for preparation and for slicing, a good large cutting board is ideal.
- Kosher Salt – Make sure you have a lot of good kosher salt on hand and that any spice rub contains kosher salt in it. We do not recommend brining with table salt with iodine.
- Paper Towels – You will need a lot of them for patting dry the skin from the brine.
Preparing Your Turkey: The Key to Crispy Skin
The foundation of crispy skin begins long before the turkey hits the smoker.
It is 100% achieved in the preparation process. After buying your fresh turkey it starts with brining. Do not brine a frozen turkey, it won’t take the brine. Follow our planning guide on how to thaw frozen turkey.
You have two brining options, wet brining and dry brining. We recommend both, regardless of whether you are smoking a whole turkey or a spatchcocked turkey.
Wet Brining
If you purchased a turkey and the labeling says it was soaked in a water solution with salt, then the turkey is already brined. We actually prefer to buy an un-brined turkey and do it ourself. If it is pre-brined, skip to the dry brine process.
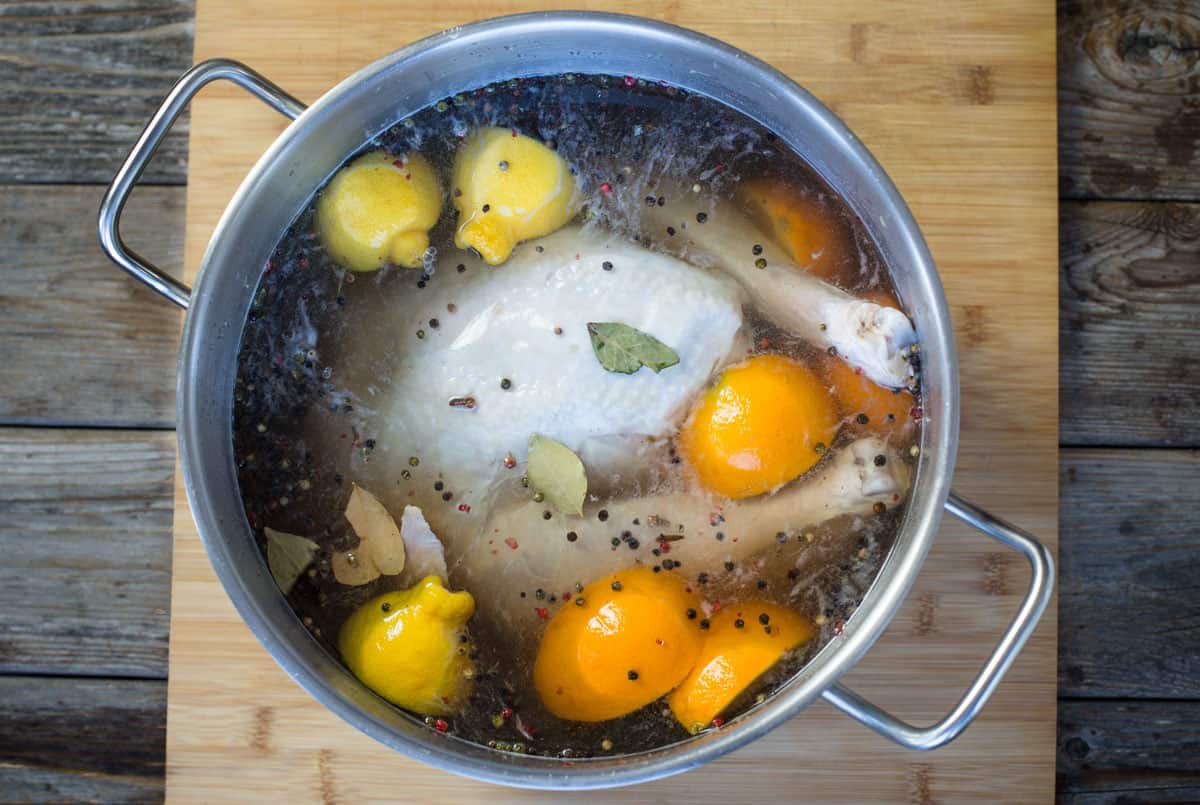
Wet brining in cold water adds moisture and flavor using the process of osmosis. During the long cooking times in a smoker, the wet brine gives you a level up to keep the moisture in the turkey as it cooks low and slow. Brine for 24 hours (and up to 30 hours, after that you start to cure and change the texture of the meat). After the turkey has brined, dry off the turkey with paper towels. Discard your brine.
Dry Brine
If you just took your wet brined turkey, seasoned it, and threw it in the smoker the skin won’t crisp up because it’s too wet. So you need to add another step in your smoked turkey preparation and that is drying out the skin and dry brining in your refrigerator. Do this at the same time.
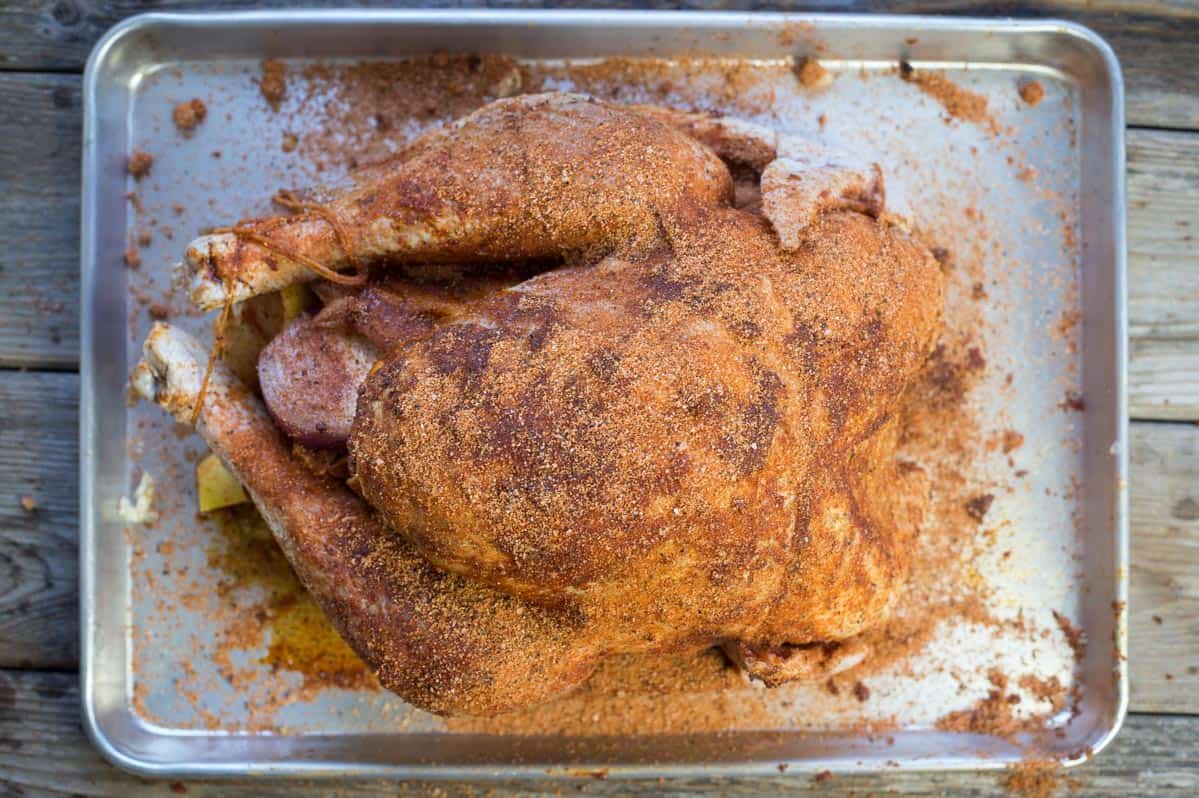
Using a kosher salt based turkey seasoning, apply the dry rub to the outside of the DRY turkey and inside the turkey cavity. If you are preparing a spatchcocked turkey be sure to season both sides. Place the dry brined turkey in the refrigerator, uncovered, for at least 3 hours, ideally overnight (12 hours). The salt will draw out moisture through osmosis, drying the skin of the bird and ensuring that, when smoked, you get that crispy turkey skin everyone desires.
Key Tip For Crispy Skin – The turkey needs to be dry and the dry brining in the refrigerator is critical to pull moisture out of the fat layer under the skin. Don’t skip either step.
Setting Up Your Smoker for Success
The choice of smoker, whether it’s a wood smoker, pellet smoker, charcoal grill, gas grill, or electric smoker, doesn’t really matter other than some temperature techniques. What is really critical is smoking at the correct temperature.
The Role of Wood
The type of wood you use contributes to the smoke flavor and can affect the moisture level of the meat. Wood chips or wood chunks of apple or cherry are a great option as they burn at a lower temperature and impart a mild smoky flavor without overwhelming the turkey meat. A good rule of thumb is to avoid woods that are too resinous or burn too hot if you’re aiming for that perfect turkey.
The Smoking Process: Achieving Crisp Skin
During the smoking process, the skin needs to be dry in order to become crispy. Before placing your whole bird in the smoker, pat the entire turkey down with paper towels to remove any extra moisture. Use a leave-in meat thermometer to monitor the internal temperature closely, ensuring the thickest part of the breast reaches the safe mark without overcooking, which could result in rubbery skin.
Would you like to save this?
Smoker Temperature and Cooking Time
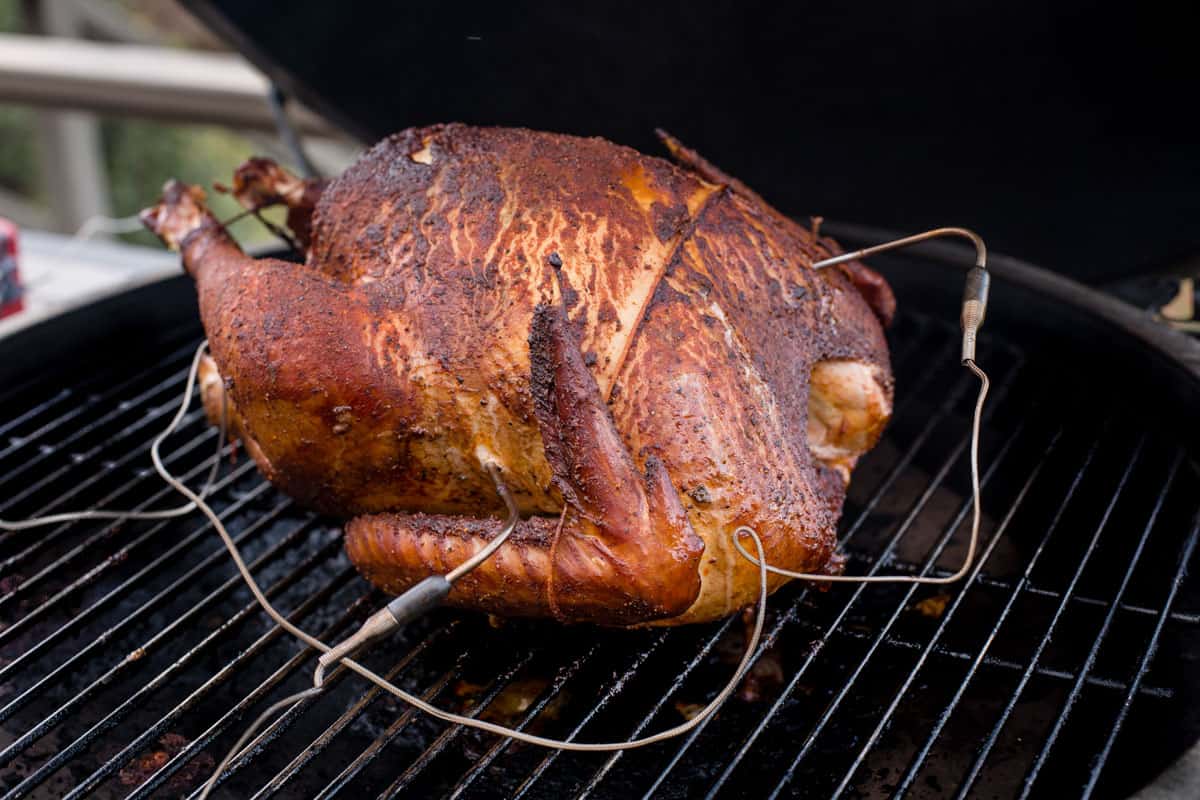
Pellet Grill Turkey: The best way to smoke a turkey and ensure tender meat with crisp skin is to start at a lower temperature. Set your smoker temperature around 250 degrees Fahrenheit to slowly render the skin while maintaining the turkey’s internal temperature for safe consumption.
Then after two hours of the low temperature raise the cooking temperature to 375 degrees F to finish the turkey and crisp up the partially rendered skin. This method is also known as reverse sear. This low and slow plus roasting approach, paired with enough time, allows the connective tissue to break down.
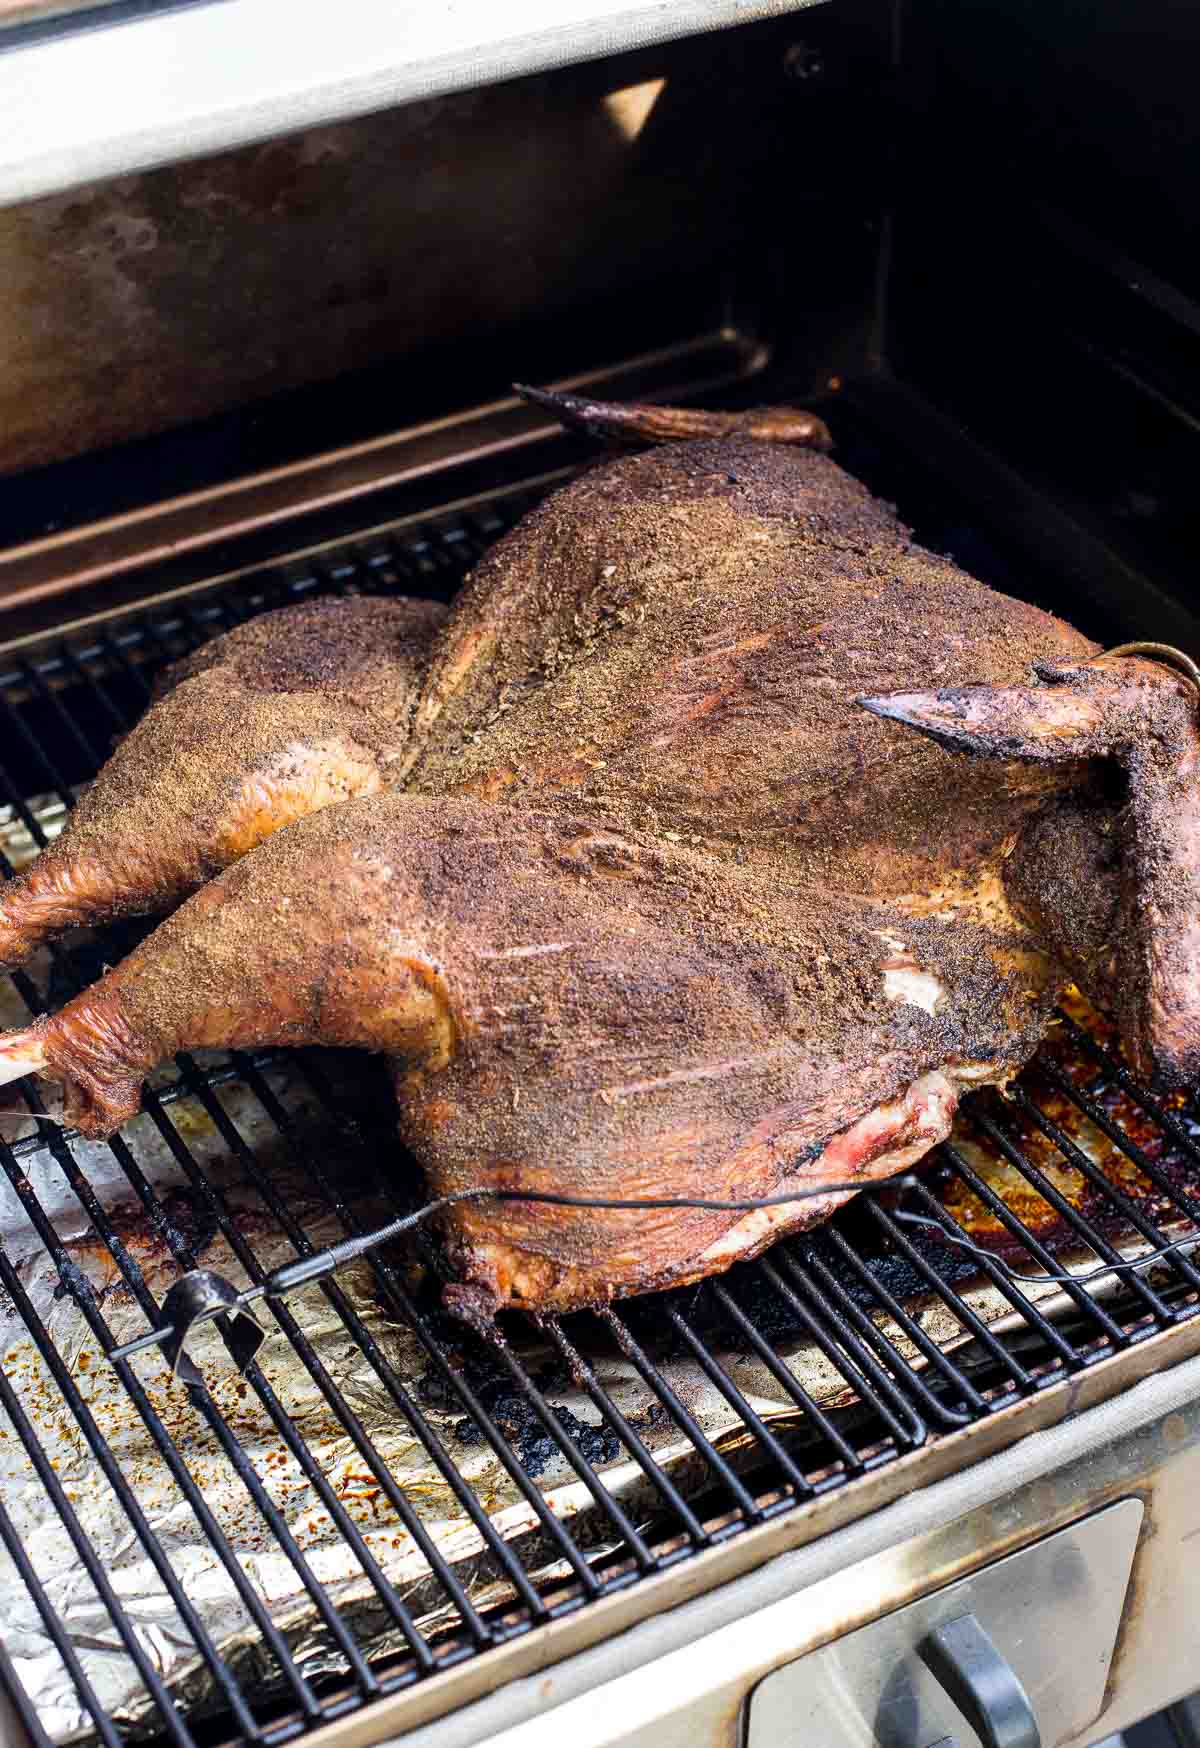
Charcoal Smoker: If using a charcoal grill like a Big Green Egg or an offset smoker, then the key is holding a consistent temperature that will both add smoke and render the fat enough for the skin to crisp up. The best temperature to smoke turkey at this method is at is 275 degrees Fahrenheit and is the temperature we recommend in our Bourbon Brined Smoked Turkey recipe.
Water Pan – In some recipes, like smoked brisket on an offset grill, we recommend a water pan to add moisture and humidity to the cooking chamber. For crispy skin on smoked turkey you do not want added moisture, you want a dry environment. So do not use a water pan.
No Basting
While the turkey is smoking, avoid basting the outside of the turkey with liquid like chicken broth, which can introduce extra moisture and make the skin rubbery. Instead, consider brushing the skin with olive oil, melted butter, or even garlic powder mixed with spices to add flavor while aiding the crisping process.
The Final Stages
The balance is always crispy skin and juicy turkey. The final secret is not overcooking the turkey and letting it reast.
Resting Your Turkey
Once the turkey’s internal temperature hits the ideal mark (160 degrees Fahrenheit in the thickest part of the breast), remove it from the smoker. Let it rest on a wire rack over a baking sheet or in a roasting pan to allow the juices to redistribute and the skin to maintain its crispiness.
Resting is critical; it ensures that the flavorful meat retains its juices, making your smoked turkey recipe a sure hit. DO NOT TENT the turkey too tightly. If you wrap your turkey up too tightly it will steam and make the skin rubbery. After all that work you don’t want that. So when covering a resting turkey just loosely place foil over the turkey.
The Crisping Burst
If the skin isn’t as crispy as desired by the end of smoking, you can give it a quick crisping burst. Transfer the turkey onto a baking sheet and into a preheated oven (ideally convection) set to 450°F (232°C) for a few minutes. Watch it closely to avoid charring. We do not recommend broiling because that will burn the upper portion of the turkey.
Serving Your Masterpiece
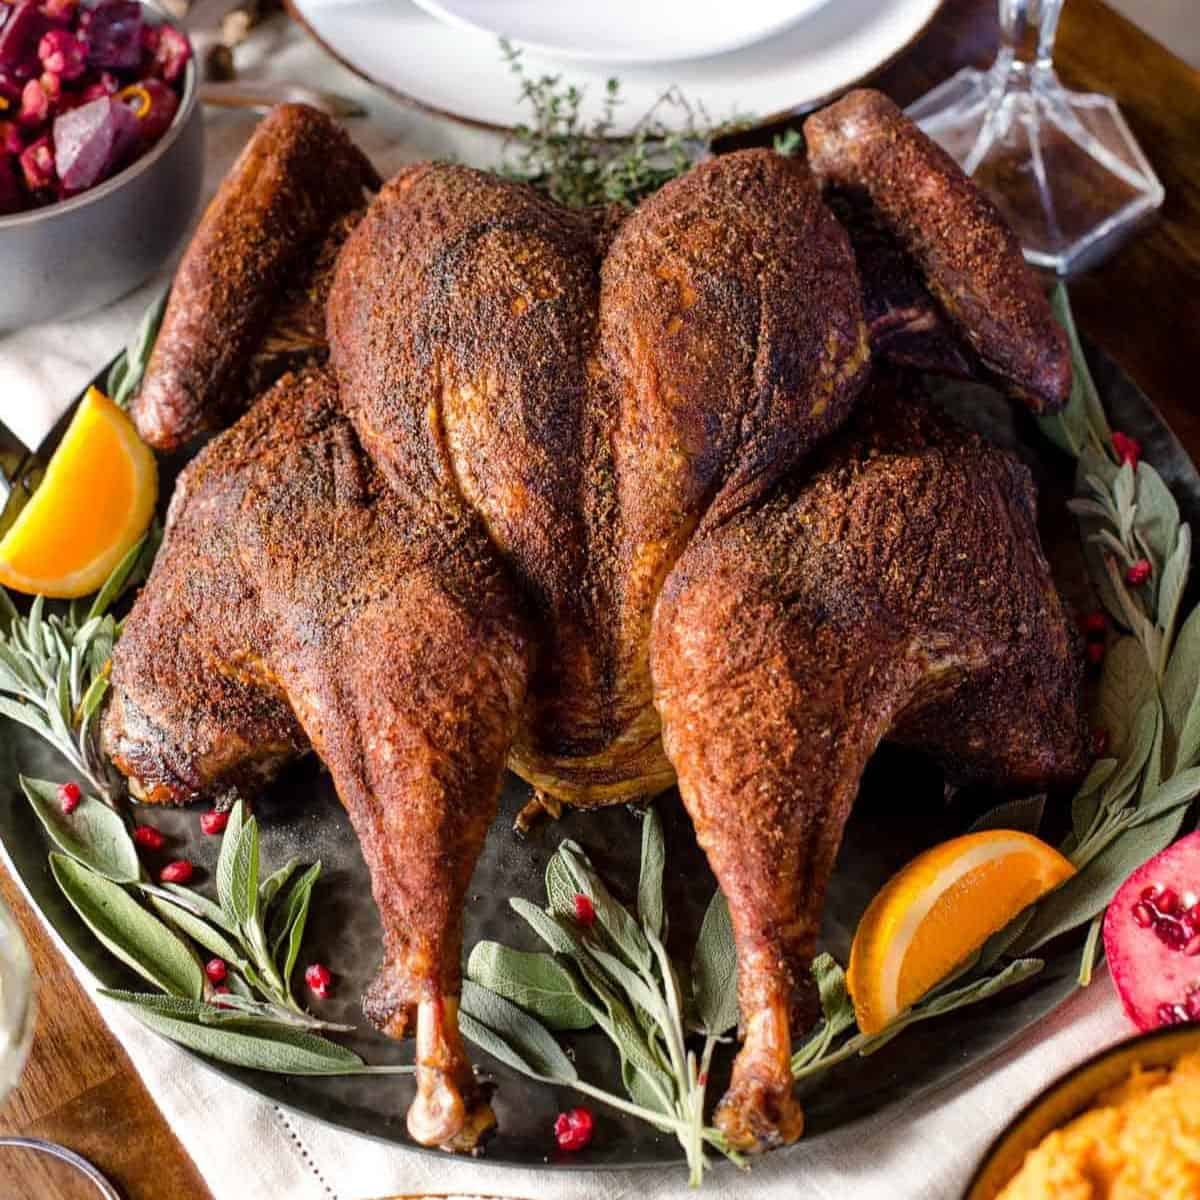
Carve your turkey with care. The crispy skin should crackle under the knife, a testament to the smoking process and the careful attention to temperature and time.

Key Tips
- Don’t Brine a Frozen Turkey – Buy a fresh turkey or a thawed turkey. If you only have access to a frozen turkey you need to give yourself enough time to thaw before you brine.
- The Turkey Needs To Be Dry – We can’t stress enough that after the wet brine, you need to completely dry the outside of the turkey with paper towels and then season it.
- Internal Temperature and Resting – Be sure you pull the turkey when it is cooked to 160 degrees F in the thickest part of the turkey breast. Then let it rest so carry overcooking can happen. That way you have the crispy skin you worked hard to get and a juicy bird.
For more tips on the perfect smoked turkey check out our article on advice for your first smoked turkey.
Final Thoughts
Getting that perfect smoked turkey with crispy skin is about balancing dry and wet elements, controlling the smoker temperature, and allowing enough time for the bird to cook and then rest. Whether it’s your first time or you’re a seasoned pro planning for next time, remember these tips to create the perfect smoked turkey for your Thanksgiving dinner or any festive occasion. With a little prep, the right temperature, and a dash of patience, you’ll serve up a bird that’s the talk of the season, leaving only the best kind of leftover turkey.
About Vindulge
Mary (a certified sommelier and recipe developer) and Sean (backyard pitmaster) are co-authors of the critically acclaimed cookbooks — Fire + Wine and Fire + Wine Backyard Pizza — and have been creating content for the IACP-nominated website Vindulge since 2009. They live in Oregon on a farm just outside Portland.

Get a signed copy of our cookbook! Order Now
Tried this recipe? Give us a star rating and we would love to see! Mention @vindulge or use the hashtag #vindulge on all the social media handles. And consider subscribing to our newsletter where we drop all our favorite ideas and inspirations weekly.