This post may contain affiliate links. Read more at our disclosure policy.
If you’ve recently purchased a Gozney Dome Pizza Oven, then there are a few techniques to develop for maximizing your purchase. This guide will walk you through how to use a Gozney Dome and how to prepare the Dome for pizzas. If you are still in the market for an outdoor Pizza Oven, then check out our Gozney Dome Review or our guide on how to grill pizza.
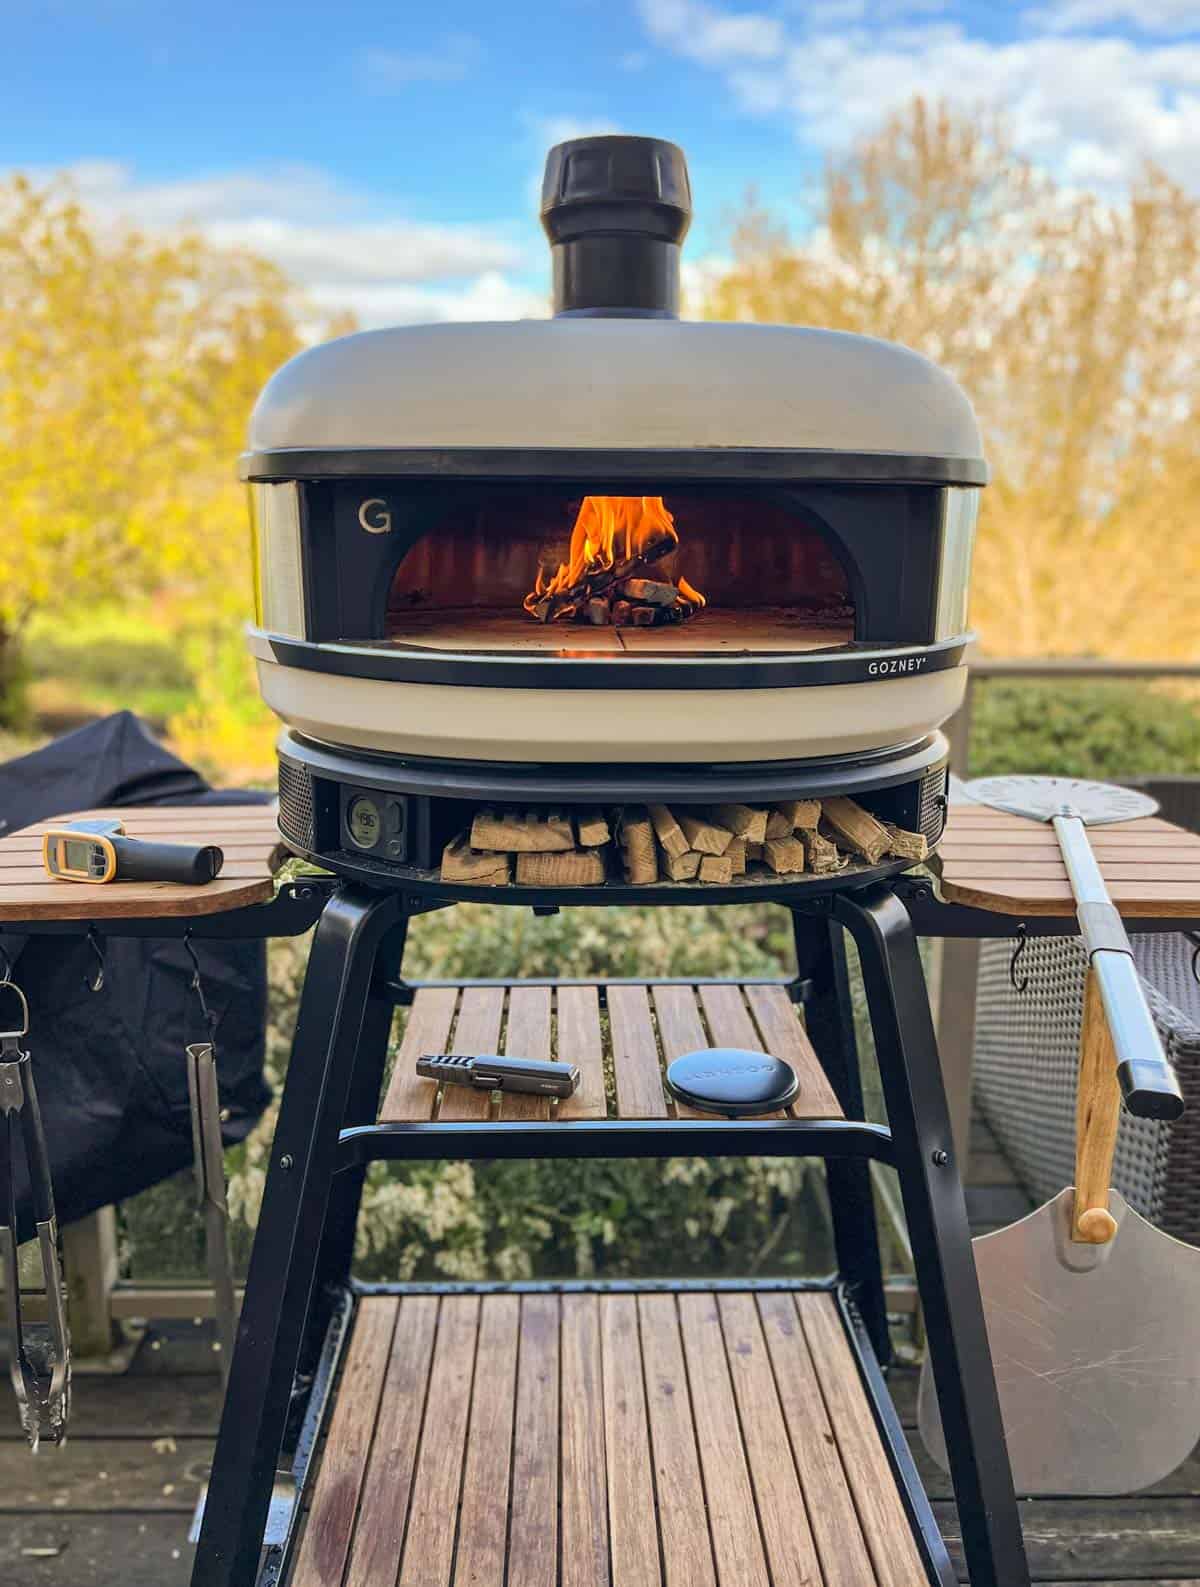
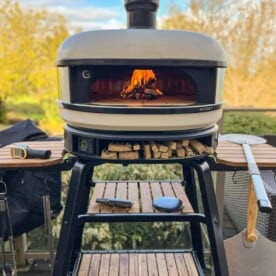
If you just landed a sweet Gozney Dome oven, then chances are you are scanning the web for videos and groups to not only share in your investment, but figure out how to use it. Like any new cooker, it requires some trial and error to get used to, but here are a few quick start tips that should get you up and running in no time for your first pizza. We are using the wood-only version, but see notes if you have the Dual Fuel.
Check out our Gozney Dome product review for more details.
Table of Contents
Tools
We have an entire guide on the best pizza tools. But when learning how to use the Gozney we recommend a few essential things.
Wood Only Unit: Have a good tumbleweed fire starter. Also use smaller split wood logs made specifically for pizza ovens. We recommend two sizes, one for starting and one for maintaining the fire. For wood we have used Cutting Edge Firewood and Carolina Cookwood.
Cooking: You want a good wood pizza peel and a good turning pizza peel. You also need a good IR thermometer, like the one from Thermoworks, so you can measure the stone floor temperature as you cook. This is an absolute must if you are hoping to cook perfect pizzas (and not burn or overcook them).

The Pizza
Be sure to match heat of the oven to the right dough hydration level and type pizza. Follow the same steps below with the targeted stone temperature.
- NY and Detroit Style Pizza: Dome temperature at 600 – 700 degrees, pizza stone at 500 – 550 degrees F and 70% dough hydration level.
- Flatbreads: Dome temperature at 700 to 750 degrees, Pizza stone at 600 degrees F and dough hydration levels 60 – 70%.
- Neapolitan Style Inspired Pizzas: Dome temperature at 900 – 950 degrees, pizza stone at 700 degrees and 56 – 66% dough hydration level.
Lighting the Fire
The goal for a Neapolitan style of pizza is a hot pizza stone that is around 700 degrees Fahrenheit (F). This means the oven will need to run at 900 degrees on average to maintain the stone floor. If you crank it up to 900 out of the gate, you can shock and crack the stone. A wood fired pizza oven takes on average 60 minutes to warm up. So be patient.
Gas Unit: Start by warming up the stone by adjusting the size of the flame using the knob. Target 300 – 400 degrees and let sit for 30 minutes. This tempers the stone. After 30 minutes target 900 degrees in the oven using the gas knob. When the stone reaches 700 degrees F, it’s ready to make pizzas.
Wood Unit: This is a three stage process that is meant to temper the heat of the stone. Use enough fuel (wood splits) to maintain the target temperatures, versus worrying how much wood you should use.
- Start Fire: Start by creating a log cabin set up with small wood splits and a tumbleweed starter in the center of the Dome. Light the starter and then target 300 – 400 degrees Fahrenheit for 20 minutes. You will add a few more small splits over the 20 minutes. This will temper the stone to prepare it for high heat.
- Warm Oven: Next, using a charcoal cleaning tool or large tongs, push the fire to the left side of the Dome and add more small wood splits. The goal is getting a hot ember base and warming up the stone floor on the left side. Keep feeding small splits keeping a rolling flame going for 20 minutes. The temperature will rise to about 600 – 700 degrees F.
- Maintain Target Temperature: The final step is moving that ember base using the same tool to the far right side of the Dome over the ash collection plate. Add a few small splits and a large split and get the internal temperature of the Dome to 900 – 950 degrees F. The goal is having a constant fire/flame running along the top of the Dome and having a large ember base to maintain the heat. After about 20 – 30 minutes, your stone should be at 700 degrees and ready for the first pizza.
Maintaining the Fire
How to use a Gozney Dome is also about maintaining the fire and heat using good fuel. For the propane unit, be sure to keep the Dome temperature at 900 degrees and avoid the flame being blown out.
Would you like to save this?
For the wood unit, follow the start up sequence. To maintain the temperature, continue to add the larger splits to keep a flame going at all times. The rolling flame will help radiate heat and cook the upper portion of the pizza, while the ongoing stone temperature cooks the bottom. Without the flame, you’ll see the Dome cool to 700 – 800 degrees and the stone floor will cool also.
Making Neapolitan Pizzas
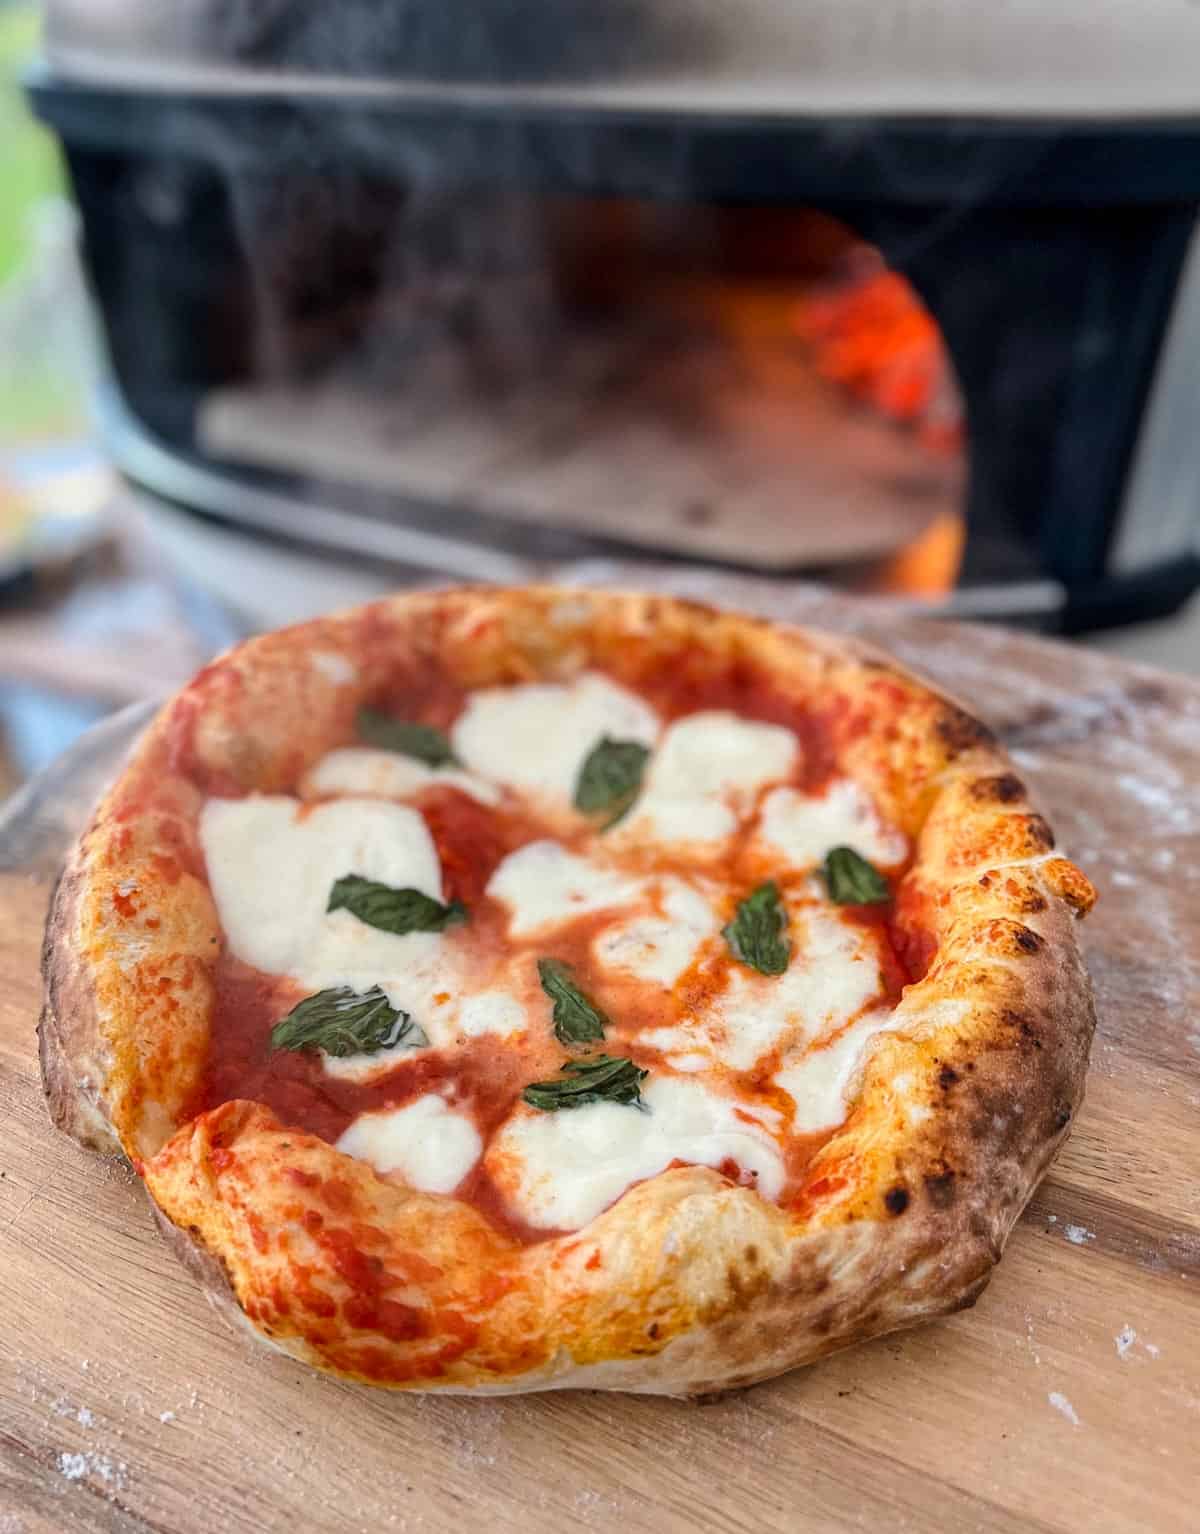
With the stone at 700 degrees, and the ambient temperature of the Dome at 900 degrees it’s time to make the first pizza.
Using the wooden pizza peel take the pizza and slide it onto the left side of the stone. Try to get it back into the stone so it’s just off the wall and not touching the embers.
Using the pizza turning peel, slowly rotate the pizza 90 degrees every 10 or 15 seconds. If you don’t rotate the crust, one side will burn. So the goal is to rotate the pizza every 10 to 15 seconds until all sides are evenly cooked and the cheese is melted.
After the pizza is cooked, remove with your peel and then serve. Use a metal scraper to move any residual food or crumbs left on the stone into the fire.
Continue to add the wood splits to the embers to maintain the temperature. Be sure to wait a few minutes before cooking the next pizza so the stone warms back up again.
Cooking in the Rain or Cold Weather
You don’t want the stone to get wet, that can cause cracks as water boils out of the stone, so keep the Dome covered between uses. But if it’s cold (under 45 degrees) or a light rain, plan on the start up time taking 90 minutes versus 60.
If heavy rain and if not covered under a canopy, consider a tent or canopy to keep heavy rain from getting into the unit. Even though the vent stack is not directly over the fire, the water can get in and cause issues with the insulation.
Clean Up
After the unit has cooled, move the ash into the ash hole and ash pit. Gently wipe out the interior stone with a dry paper towel to remove excess soot and it’s ready for the next cook.
Discard the cooled ash after every cook.
As the fuel burns, creosote and soot will develop on the inside and outside of the Dome. After the Dome has cooled, be sure to wipe off the outer edge of the Dome with a good degrease cleaner. If a heavier soot residue, use something like Barkeepers friend.
For large creosote build up (black flaky substance in the dome) gently knock it off and then discard. It is not good seasoning.
Recipe Inspirations
Here is a list of our favorite pizza recipes.
- Neapolitan Inspired Pizza Dough – Yields 3 dough balls
- No Cook Pizza Sauce
- Classic Margherita Pizza (Neapolitan Inspired)
- Smoked Brisket Pizza
- BBQ Chicken Pizza
- Smoked Buffalo Chicken Pizza
How to Use a Gozney Dome Wood Fuel Oven
Equipment
- 1 Turning Pizza Peel
Ingredients
- 6 inch wood splits
- 10 inch wood splits
- 1 piece tumbleweed fire starter
- 1 pizza
Instructions
- Start Fire: Start by creating a log cabin set up with small wood splits and a tumbleweed starter in the center of the Dome. Light the starter and then target 300 – 400 degrees Fahrenheit for 20 minutes. You will add a few more small splits over the 20 minutes. This will temper the stone to prepare it for high heat.
- Warm Oven: Next, using a charcoal cleaning tool or large tongs, push the fire to the left side of the Dome and add more small wood splits. The goal is getting a hot ember base and warming up the stone floor on the left side. Keep feeding small splits keeping a rolling flame going for 20 minutes. The temperature will rise to about 600 – 700 degrees F.
- Maintain Target Temperature: The final step is moving that ember base using the same tool to the right side of the Dome over the ash collection plate. Add a few small splits and a large split and get the internal temperature of the Dome to 900 – 950 degrees F. The goal is having a constant fire/flame running along the top of the Dome and having a large ember base to maintain the heat. After about 20 – 30 minutes, your stone should be at 700 degrees and ready for the first pizza.
- Make Pizza: Slide the prepared pizza onto the left side of the stone as deep as possible with the wooden pizza peel. Begin rotating the pizza with the turning pizza peel every 10 – 15 seconds to allow dough to cook evenly. You'll see the dough rise, and the leopard spots develop. After you have rotated the pizza 360 degrees it should be done (less than 90 seconds) and remove with the turning pizza peel. Slice and serve as recipe suggests.
Video
Notes
Nutrition information is automatically calculated, so should only be used as an approximation.