This post may contain affiliate links. Read more at our disclosure policy.
The secret to learning How to Grill Pizza starts with the style of pizza you want, and what grill you want to make it on. From Pellet Grill Pizza, to real wood-fired Neapolitan style pizza, this post explains what you need to know to get started with pizza on the grill, plus our favorite grilled pizza recipes.
If you are researching how to make grilled pizza, you’ll find a number of recipes that focus on one specific style of pie. Not all recipes work for different styles of grills. If you want to learn how to adapt to any style of grill this guide walks through everything you need to know for grilled pizza – from the dough, the sauce, and the temperature in which you can achieve that perfect flavor and bite – on any kind of grill.
Table of Contents
- The Tools for Grilling Pizza
- Pizza Dough
- Pizza Sauce
- Building The Pizza
- Using a Pizza Stone: Temper the Pizza Stone
- How to Grill Pizza
- Grilled Pizza on Pellet Grills
- Grilled Pizza on Charcoal Grills
- Can I Grill Pizza Directly on the Grill Grates?
- Wood Fired Pizza Ovens
- Our Favorite Grilled Pizza Recipes
- How to Grill Pizza
The Tools for Grilling Pizza
A successful pizza requires some specific tools. When we first learned how to grill pizza it was a combination of using what we already had (which wasn’t much) and then realizing that we needed to invest in some specific tools to make the preparation and cooking experience successful. Check out our full guide for essential pizza tools. And if you plan to grill pizza regularly (we do it every Friday) then you’ll want these tools as a minimum.
- Dough Tub – A good 6-quart dough tub is perfect for making homemade dough.
- Digital Scale – When making homemade dough for grilled pizza, it is essential that you weigh the ingredients (do not rely on cup measurements). A good digital scale is important.
- Wooden Pizza Peel – Prepping on a wooden peel is important so you can slide it easily onto the cooking surface. If doing Neapolitan style pizzas, it also stays cool so the dough doesn’t get too warm.
- Metal Pizza Peel – The metal peel is great for removing the pizza from the grill.
- Pizza Turning Peel – This specific tool is like a full peel but smaller, and specifically made to rotate pizza in your grill or dedicated pizza oven. All grills or ovens have uneven temps, so you can easily rotate the pizza with the smaller peel. This is essential for specifically a wood-fired pizza oven.
- Pizza Stone – While you can use baking steel, we prefer pizza stones when learning how to grill pizza as it retains the heat and minimizes burning crust with live fire. Buy a stone that is slightly smaller than your grill width and at least 13-inches wide.
- IR Thermometer – This style of instant read thermometer measures the surface temperature of the pizza stone and important when trying to get the perfect crust.
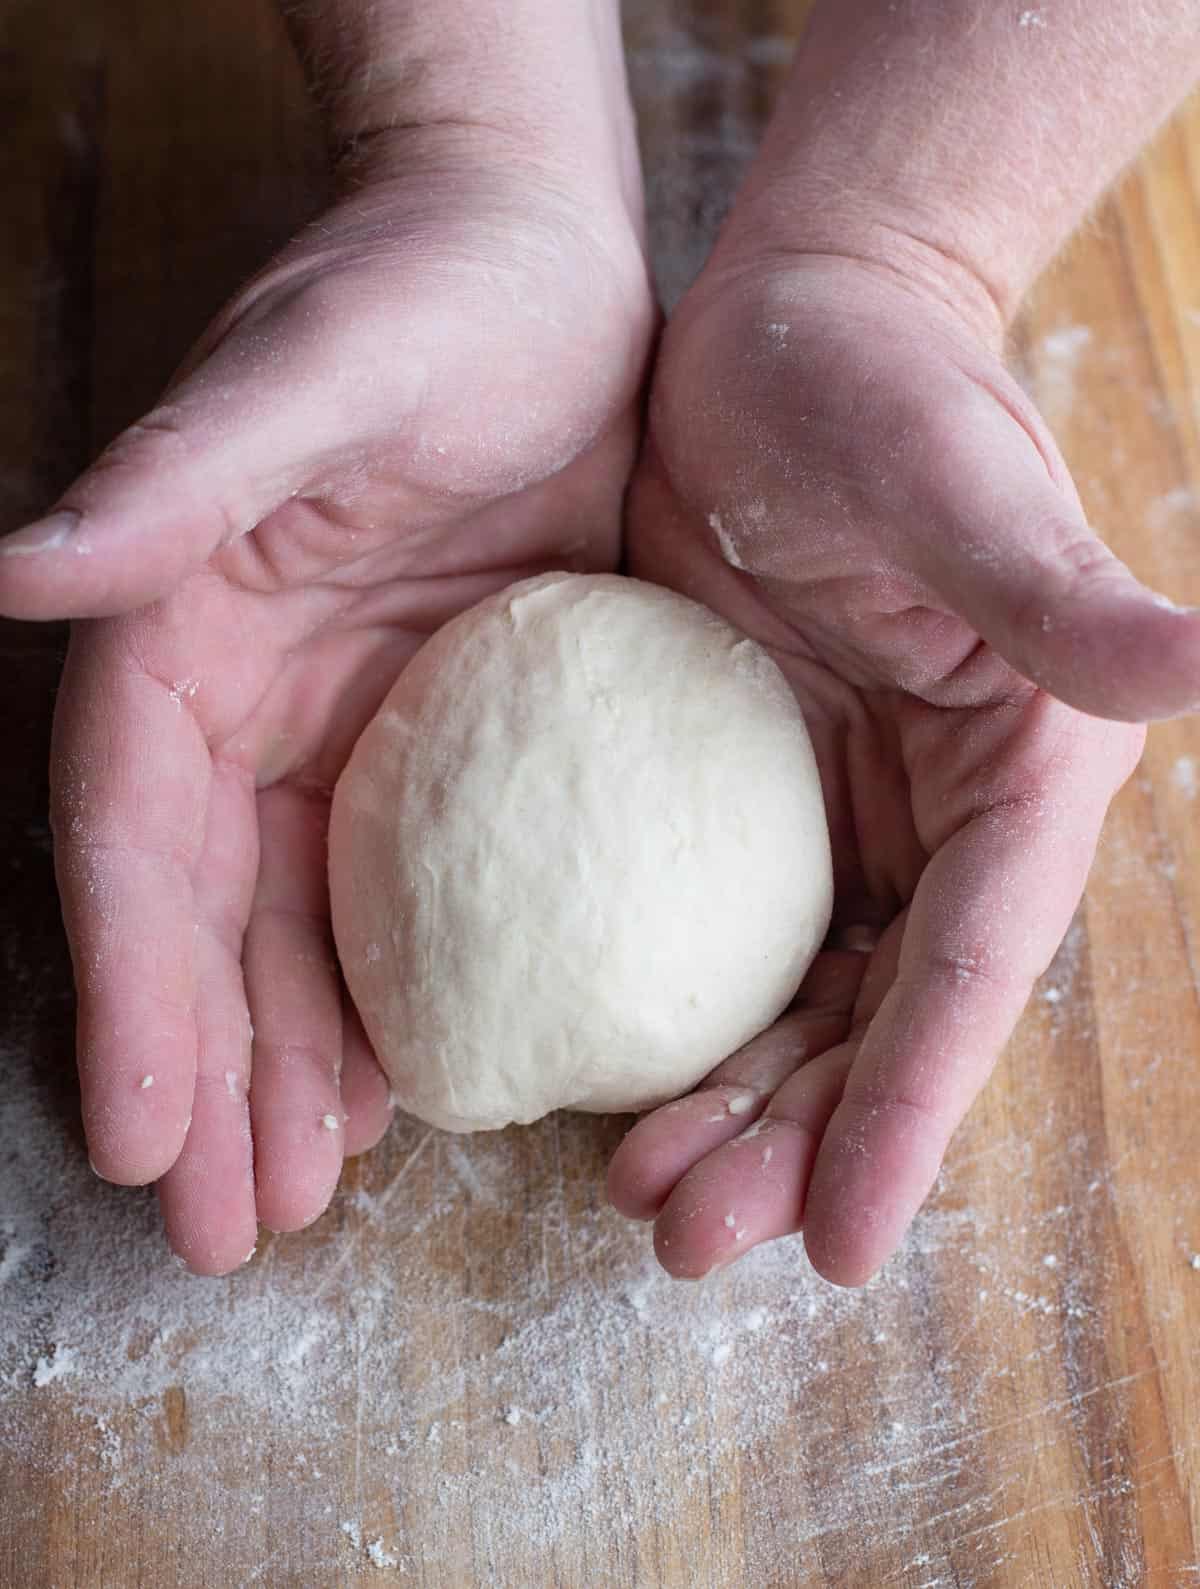
Pizza Dough
You can easily buy a pre-made pizza dough from the grocery store or your local pizza joint. Often they cost about $5.00 and get the job done decently. And if you haven’t invested in all the preparation and tools, it’s easier to start with pre-made dough.
But to truly get the perfect grilled pizza crust you need to match the dough to the right style of pizza you plan to make. And that requires a homemade pizza dough. The secret to great pizza dough for the grill is to adjust the moisture level of the dough based on how hot the pizza stone is. The hotter the pizza stone, the less moisture you want in the crust.
Chef’s Tip: When you search dough recipes online, you’ll sometimes see writers talk in percentages, like 68% hydration level. This is the ratio of water-to-dough ingredients. So if you use 340 grams of water to 500 grams of flour, then you have a 68% hydration level. As you perfect your own style and dough recipe, adjust the hydration levels to your desired pizza style. Another reason a scale is essential for measuring your water and flour.
For Neapolitan style we like 66 – 68% hydration level. For NY or Detroit style pizza we like a 70% hydration level.
Also fresh yeast is important. Having yeast over 6 months old may not activate and create the expansion you want. More on that in our pizza dough article.
Pizza Sauce
The next thing we learned in how to grill pizza is using a fresh but simple no cook pizza sauce that will not over saturate the dough. That means you don’t want it to be watery, it should be slightly thick. And don’t overdo it on the sauce. A little goes a long way. Plan 1/4 cup of sauce per 10-inch pizza.
Building The Pizza
The number one secret we learned in how to grill pizza successfully? Don’t overload the pizza. Too many toppings will make the dough heavy and saturate it with moisture. This is the main reason you may get a crust that won’t cook as fast as you want. Keep it to three or four ingredients at a time.
- Start by layering the wooden pizza peel with a light dusting of flour. Then gently roll out your pizza into your desired size. At this point, lift the pizza on one side and then add some corn meal onto the peel (large grit). Repeat for the other side of the pizza. This will act like ball bearings and allow the pizza to easily slide off onto the stone. Shake the peel and the dough should slide back and forth.
- Then add your sauce, cheese, and then desired toppings (remember, not too many!). Now it’s ready to grill.
Using a Pizza Stone: Temper the Pizza Stone
The first time you use a pizza stone, we recommend you temper it so it can absorb heat for the first time and cool down before a pizza is made. Do this ideally the day before you cook your pizza. You only have to do this once, and it helps prevent cracking your stone on the first cook. (Trust us from experience)
To do this, set up the grill for indirect cooking and prepare the heat. Target the internal cooking chamber at 500 degrees F. Ideally, leave the stone on the grill as it warms up (so it slowly warms up with the grill) and then when the grill reaches 500 degrees, continue running the grill for 45 minutes. Then let cool.
- Pellet Grills: Not all pellet grills reach 500 degrees, so use the highest temperature you can for tempering the stone in this case.
- Kettle Grills: Keep the charcoal to the outer edges of the stone to prevent it from cracking the stone. If you place the charcoal directly under the stone on a kettle grill, the heat could be as high as 900 degrees. By dispersing it to the outer edges, it’s must gentler on the stone and less likely to crack.
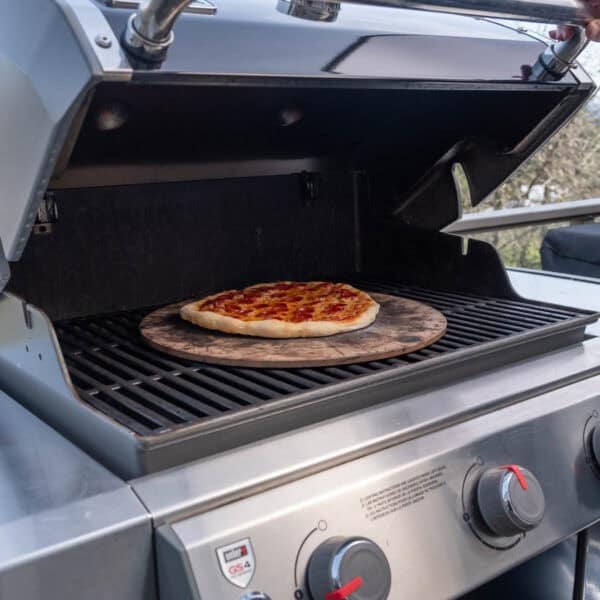
- Gas Grills – Be sure your stone will fit in your gas grill, and if it does, be sure that the burners lit are not directly under the stone. Place the stone in the center, and use the outer burners for heat management.
Rain – If your stone has gotten wet, we recommend tempering again at a lower temperature to make sure there is no moisture that can cause cracks.
How to Grill Pizza
Regardless of the type of grill, the process is the same.
Would you like to save this?
- Prepare the grill for indirect cooking. By deflecting the direct heat from the fuel source away from the stone, you prevent the pizza stone from cracking (See tempering pizza stone). Target 500 degrees F for NY Style pizza.
- Using your IR Thermometer, check the pizza stone temperature. When it reaches 500 degrees, you are ready to grill the pizza. Slide the pizza from the wooden pizza peel onto the stone. Close the lid.
- Monitor the pizza and be sure to use the Pizza Turning Peel to rotate the pizza 90 degrees every few minutes.*
- After the required time of rotating the pizza, remove the pizza with your pizza peel. Make sure to transfer your pizza to a cutting board for slicing. Do NOT cut your pizza on your pizza peel. By doing so you create a rough gritty surface, making it difficult to slide your pizza next time you use it. You want to keep your pizza peel surface smooth.
* If you are going for Neapolitan style pizza, you’ll need the stone at 700 degrees F, we only recommend that on a pizza specific grill or oven meant for this style pizza, like a Gozney Dome, Roccbox, Camp Chef Pizza Oven, or Ooni. Even on a Big Green Egg at 700+ degrees you run the risk of frying the gaskets at that heat for a long period of time.
A note on the first pizza: If you are making several pizzas, the first pizza will always run longer and will cool the stone down after it’s done. Before cooking the next pizza, be sure to wait for the stone to rise again to 500 degrees F.
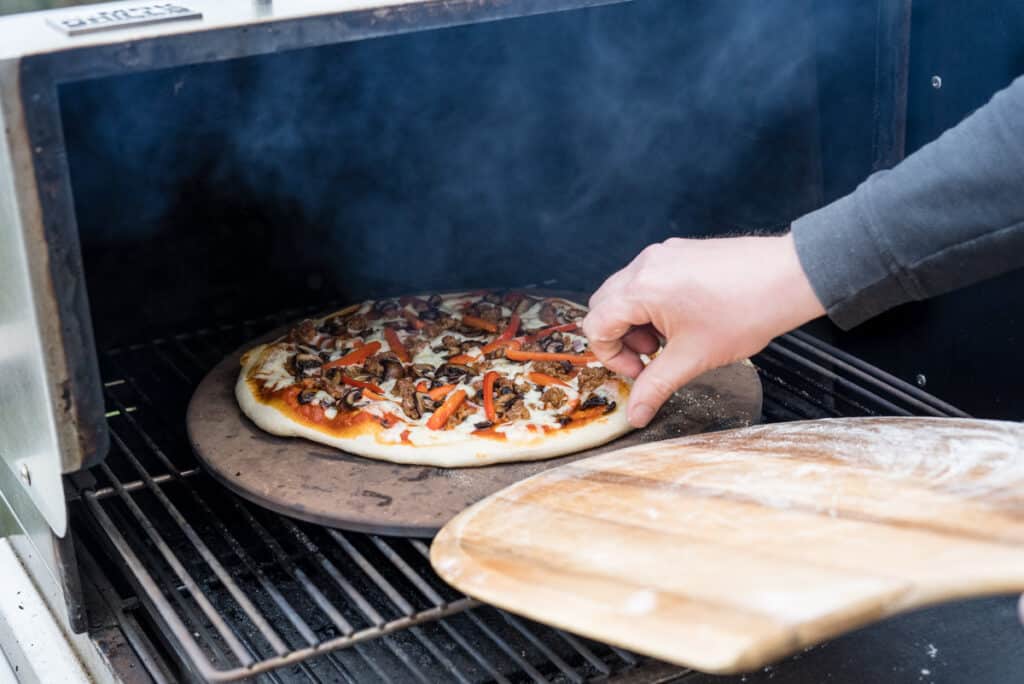
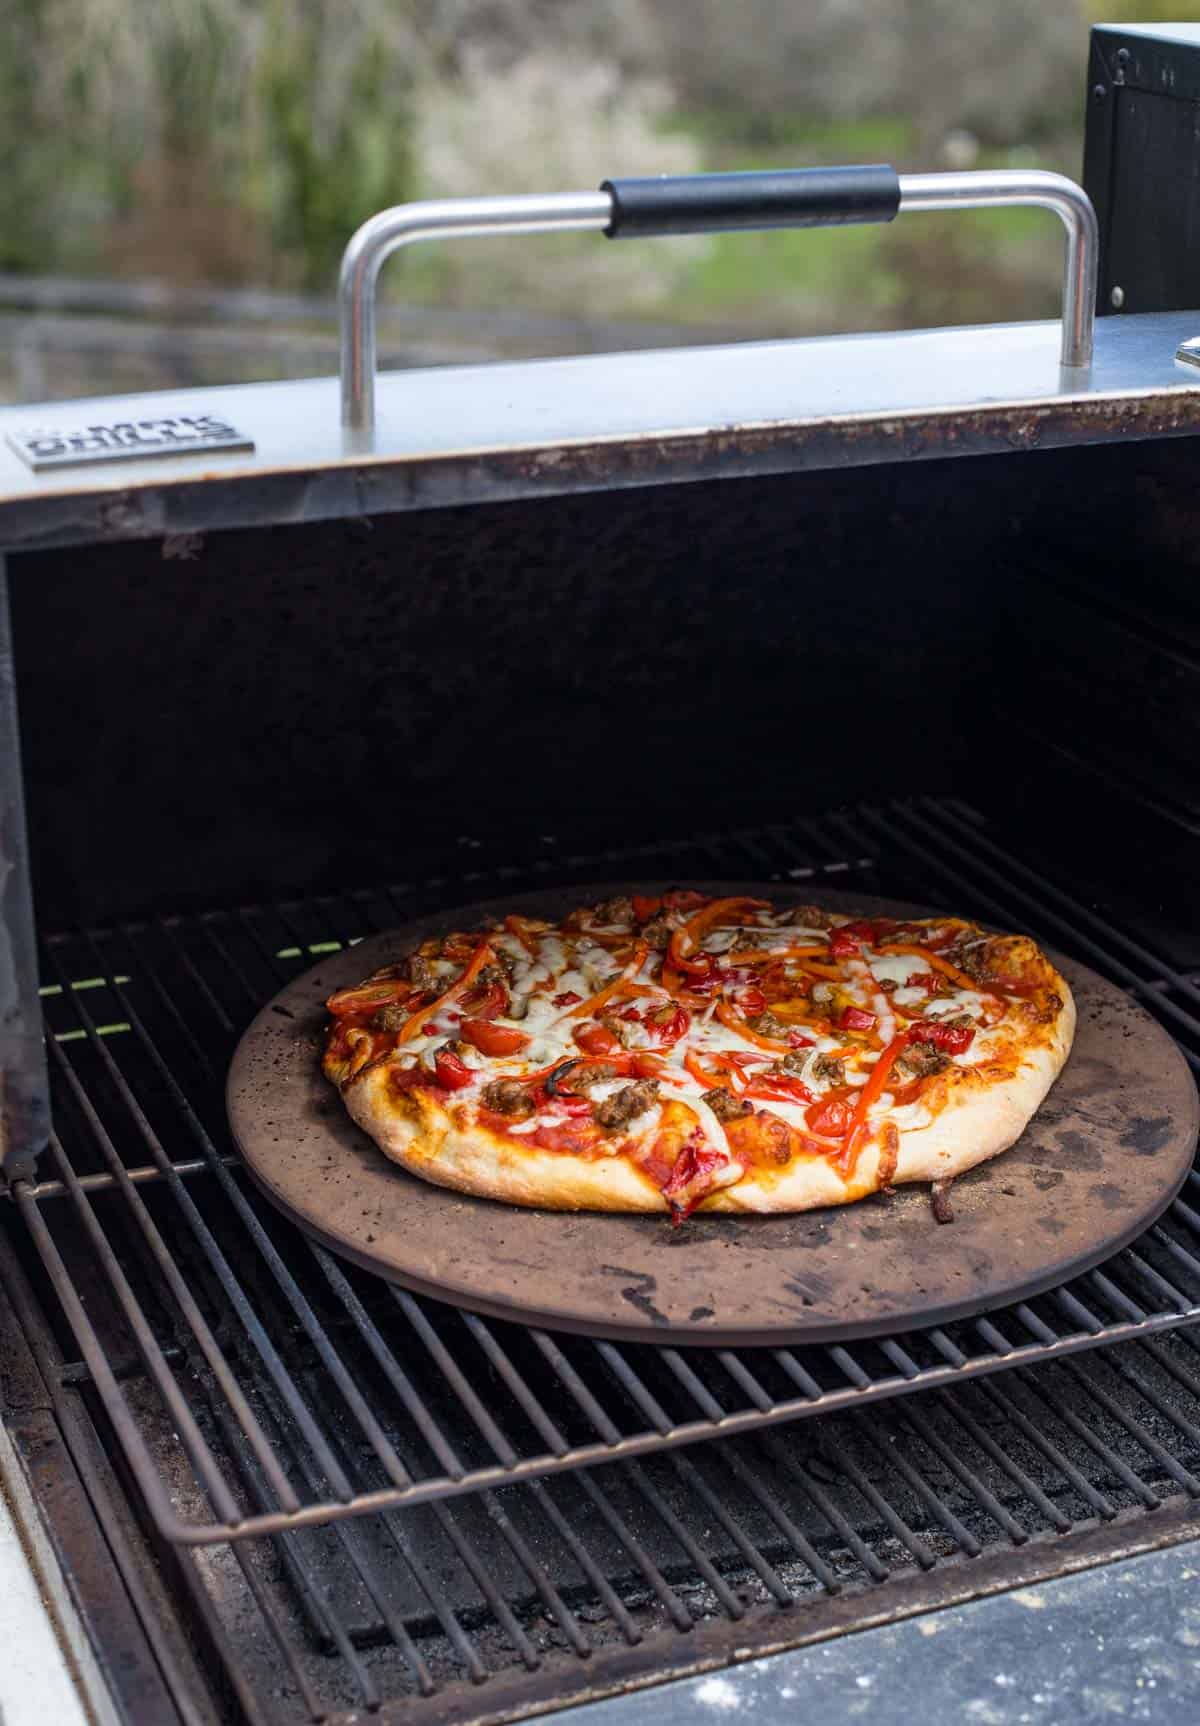
Grilled Pizza on Pellet Grills
For pellet grills, we recommend raising the pizza stone off the bottom grate to take advantage of the convection heat. Use a middle rack or rack system to do this. If you can’t use a rack, be sure to monitor the temperature of the stone.
We recommend the hydration level of the dough at 70%.
We walk through this in more detail in our guide for pellet grill pizzas.
Grilled Pizza on Charcoal Grills
Kettle Grills: Keep the charcoal to the outer edges of the stone to prevent it from cracking the stone. If you place the charcoal directly under the stone on a kettle grill, the heat could be as high as 900 degrees. By dispersing it to the outer edges, it’s must gentler on the stone.
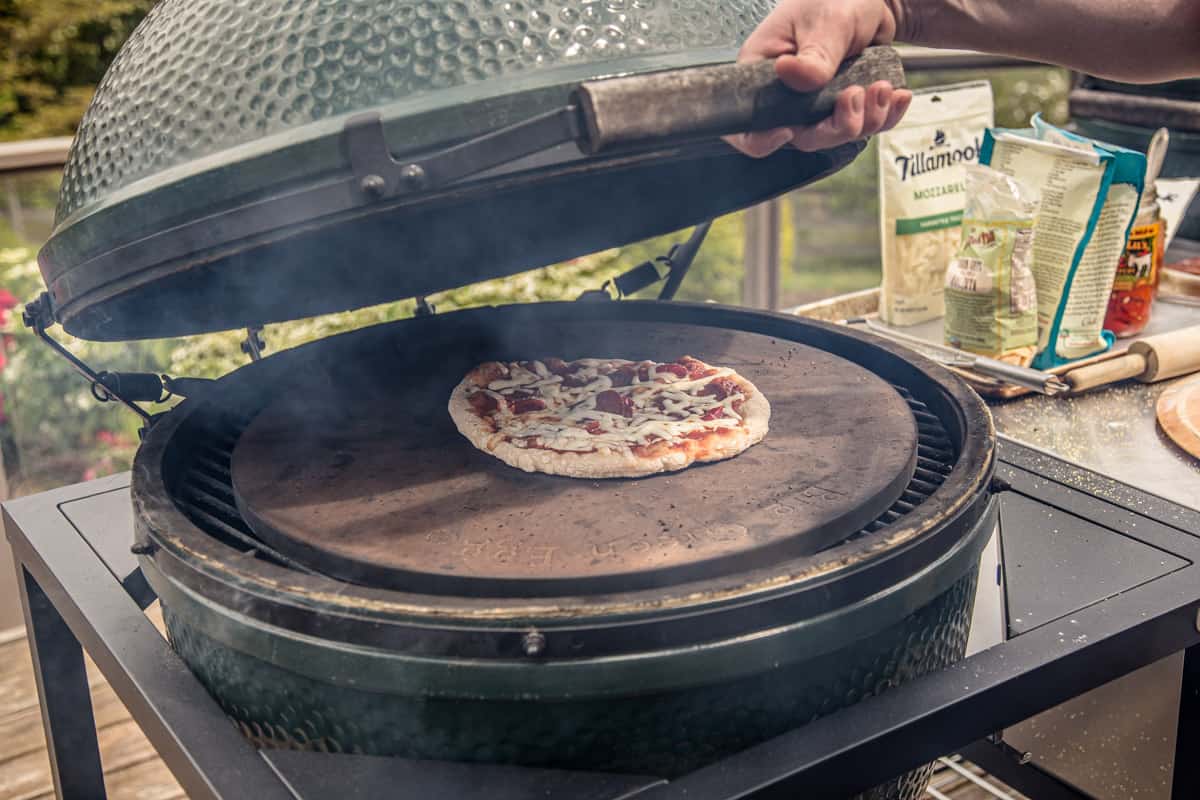
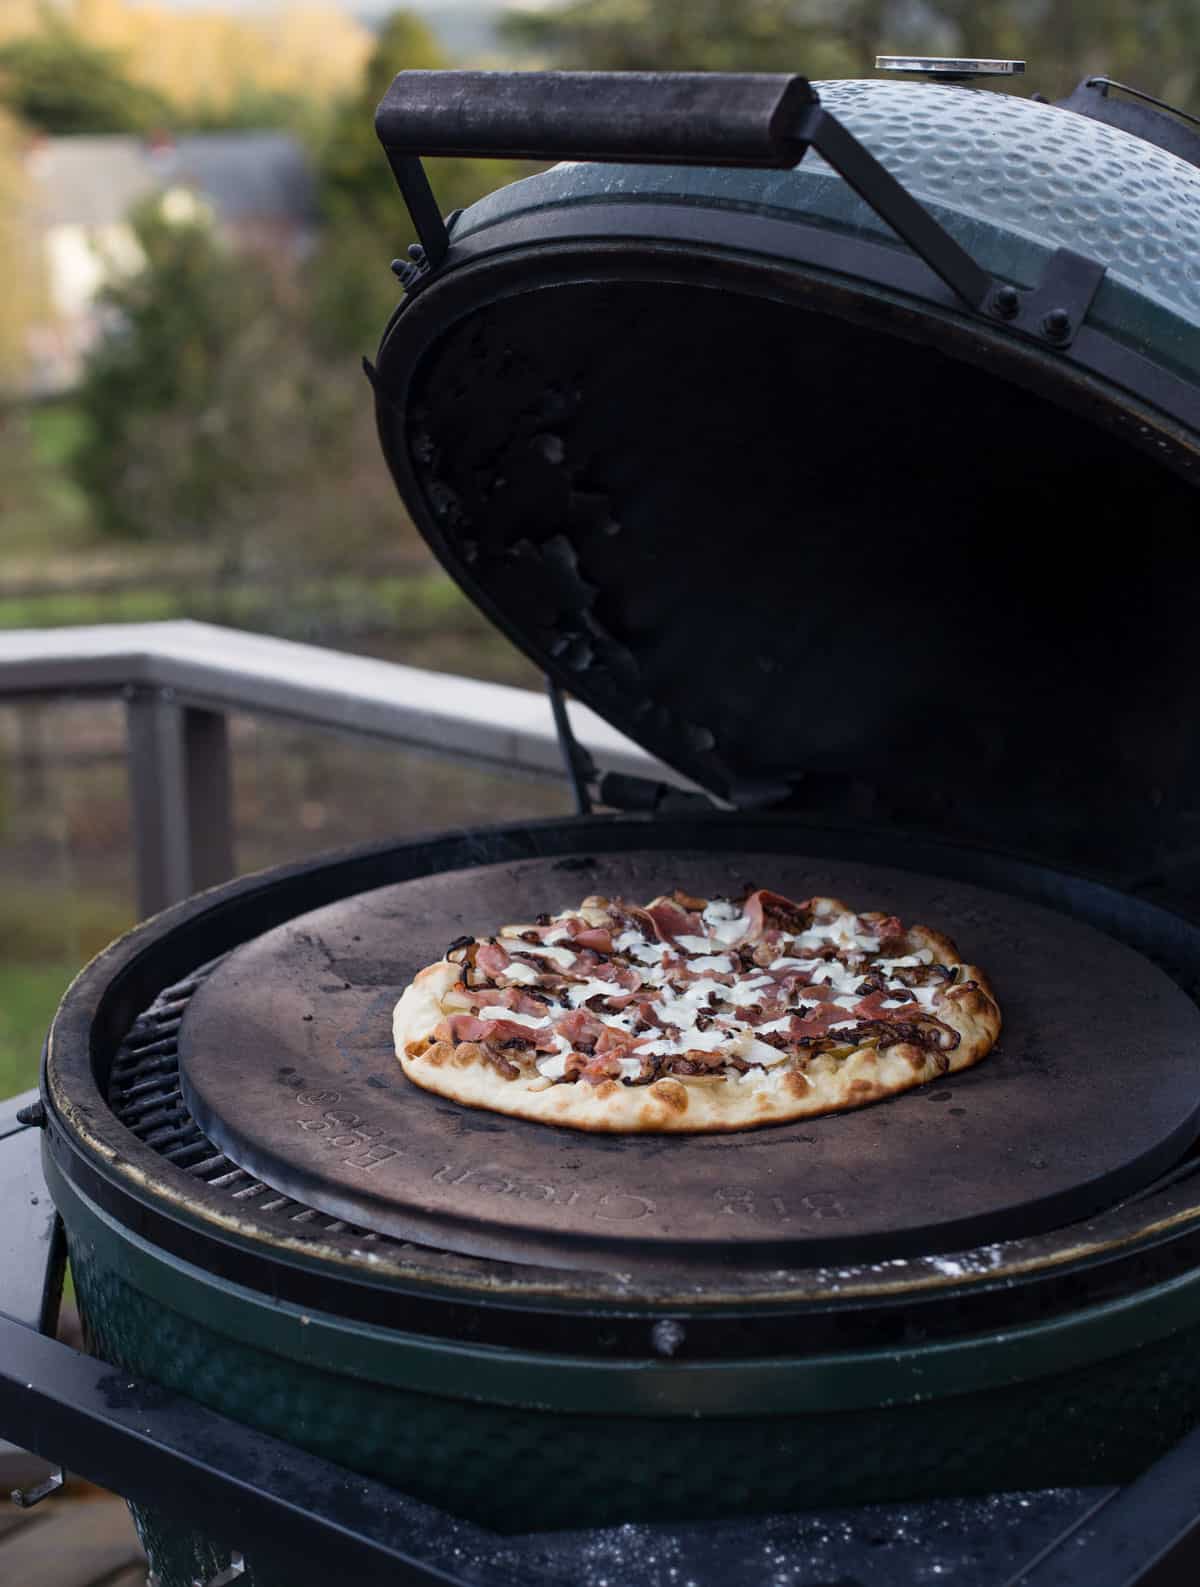
Kamado Grills: On our Big Green egg we start with the Conveggtor plate with the legs up, and then the grate on top, and then place the pizza stone on the grate. We DO NOT recommend making the pizzas directly on the Conveggtor plate. This elevates the pizza slightly and takes advantage of the convection currents. We walk through this in more detail in our guide on how to grill pizza on a Big Green Egg.
For charcoal grills we recommend a 70% hydration level.
Can I Grill Pizza Directly on the Grill Grates?
Yes, but we don’t recommend this. If you grill a pizza directly on the grates you need to par-bake the crust and be sure it is set for two-zone or indirect grilling. Place your rolled out dough (with no toppings) on the grill for about one to two minutes per side, to get the cooking process started. Then remove the dough when it feels sturdy enough to manage.
Then add your toppings, and then place it back onto the grates to finish cooking. If you place your uncooked dough, with toppings, onto the grill the dough will start to fall through the grates. This is why we recommend using a pizza stone vs grilling the dough directly on the grates. The pizzas tend to come out inconsistent using this method. A stone is a worthy investment for better pizzas on the grill. Or invest in a stand alone wood fired pizza oven like the Gozney Dome or pizza oven attachment like the Camp Chef Sidekick Pizza Oven.
Wood Fired Pizza Ovens
As you strive for a thinner crust Neapolitan style pizza, that’s when you get get the higher heat from a dedicated pizza oven. They range from small to large depending on your budget and goals. If learning how to grill pizza regularly is something you hope to make, we recommend purchasing a dedicated pizza oven.
These allow you to get your temperature higher. For Neapolitan pizzas as we like the pizza stone to be at 700 degrees F. Which means the cooker itself is running around 850 – 900 degrees Fahrenheit. Pizzas at this temperature cook in under 2 minutes.
We recommend a 66 – 68% hydration level on the dough for this style of pizza.
One of our favorites is the Gozney Dome Dual Fuel Oven. If you own one, you can also see our guide on how to use The Gozney.
Our Favorite Grilled Pizza Recipes
Here are some of our favorite pizza recipes cooked on the grill.
- Single Pizza Dough Recipe
- Neapolitan Style Pizza Dough Recipe – Yields 3 11-inch dough balls
- Sausage and Pepper Pellet Grill Pizza
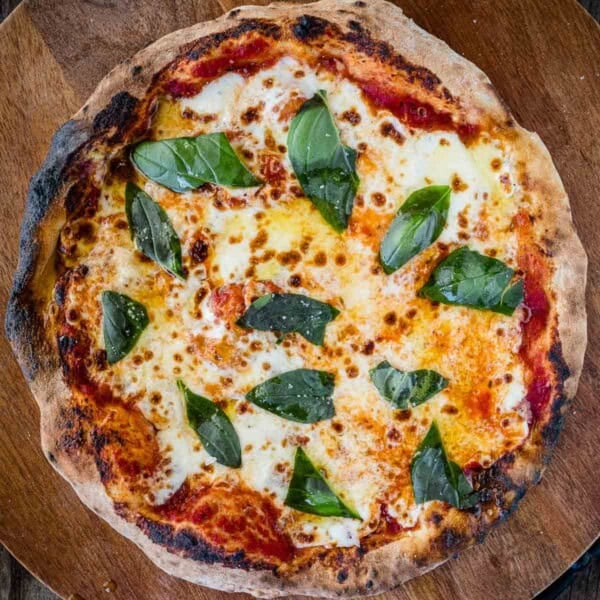
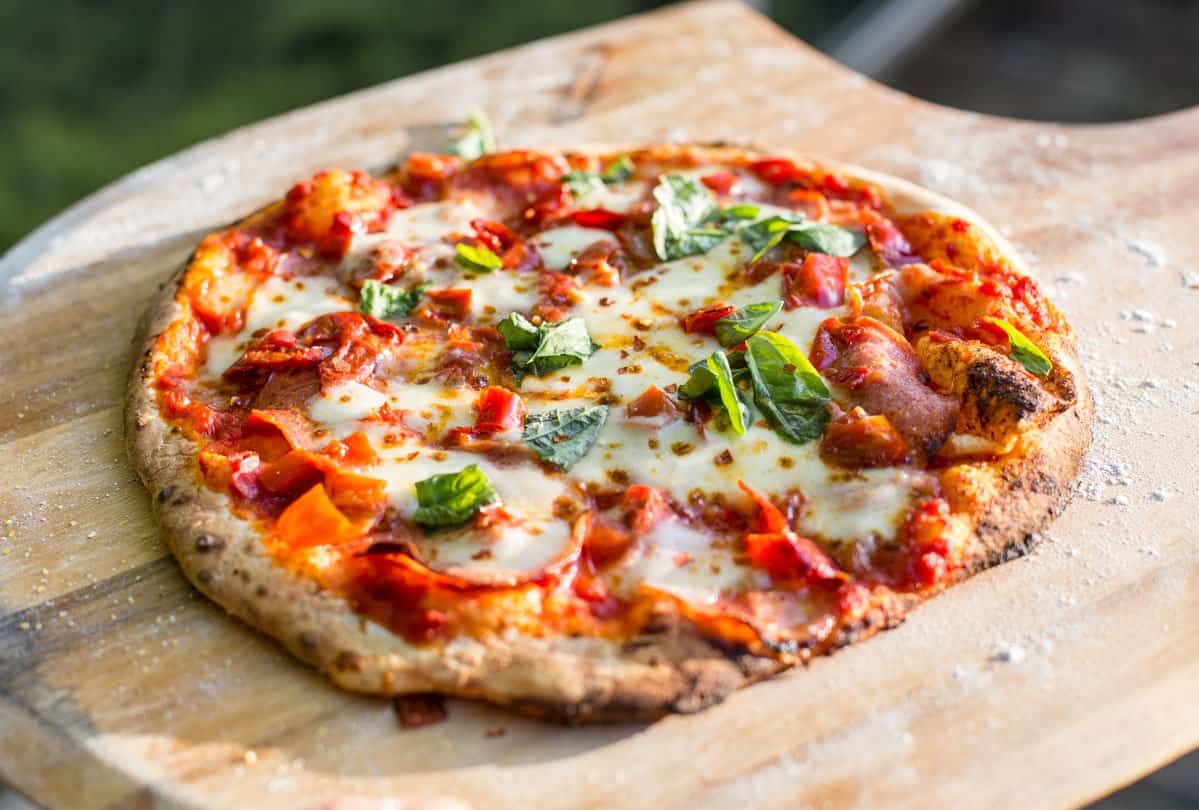
- Margherita Pizza Recipe
- Pear and Prosciutto Grilled Flatbread Pizza
- Grilled Frozen Pizza (yes, it’s a thing)
- BBQ Chicken Pizza
- Brisket Pizza
- Grilled Buffalo Chicken Pizza
- Grilled Pizza on the Big Green Egg
How to Grill Pizza
Equipment
Ingredients
- 1 ball pizza dough
- ¼ cup pizza sauce
- 1 cup mozzarella cheese
- optional toppings
Instructions
- Prepare Grill: Prepare the grill for indirect cooking. By deflecting the direct heat from the fuel source away from the stone, you prevent the pizza stone from cracking (See tempering pizza stone). Target 500 degrees F for NY Style pizza.
- Prepare Dough on Peel: Start by layering the wooden pizza peel with a light dusting of flour. Then gently roll out your pizza into your desired size (10-12 inches work best for this style of pizza). At this point, lift the pizza on one side and then add some corn meal onto the peel (large grit). Repeat for the other side of the pizza. This will act like ball bearings and allow the pizza to easily slide off onto the stone.
- Build Pizza: Then add your sauce, cheese, and then toppings. Now it’s ready to grill.
- Confirm Pizza Stone Temp: Using your IR Thermometer, check the pizza stone temperature. When it reaches 500 degrees, you are ready to grill the pizza. Slide the pizza from the wooden pizza peel onto the stone. Close the lid.
- Rotate Pizza: Monitor the pizza and be sure to use the Pizza Turning Peel to rotate the pizza 90 degrees every few minutes until the rim is golden, the cheese is melted, and the bottom of the dough cooked through.
- Remove: Remove the pizza with your pizza peel and transfer to a cutting board for slicing.
Notes
Nutrition information is automatically calculated, so should only be used as an approximation.