Grilled Ribeye Steaks Cooked in a Fire Pit (Live Fire Steaks)
Feb 08, 2023, Updated Aug 05, 2025
This post may contain affiliate links. Read more at our disclosure policy.
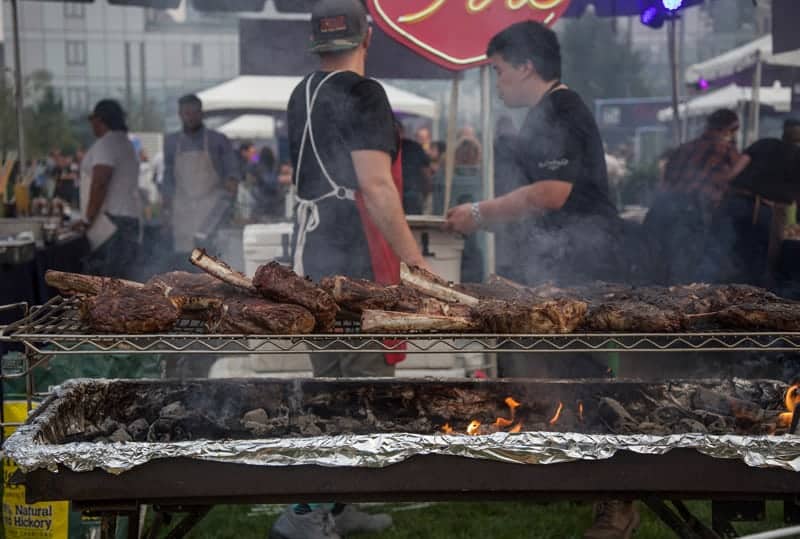
Grilled live fire steaks over open fire has been a tradition for tens of thousands of years. Learn how easy it is to grill steaks over open fire or in a fire pit using a grill accessory. From camping to the beach, you can get amazing flavor and perfectly grilled steaks like Grilled Cowboy Ribeyes.
Grilling with charcoal is a great way to add incredible flavor to meats that is hard to replicate in an oven or stove top.
But an even more exciting way to grill is to use wood that has burned down into embers for authentic live fire cooking. It’s a great way to grill on the beach, in a campground, or even your backyard fire pit with grilling accessories. This guide is a breakdown of the steps on learning how to grill steaks using live fire. Try it with Grilled Bison Steaks too.
Table of Contents
- Article Highlights
- What is Live Fire Cooking?
- How it Works
- Tools
- What to Cook Over Live Fire
- Planning and Tips
- Ingredients for Grilled Ribeye Steaks over Live Fire
- Flare Ups
- How To Grill Live Fire Steaks
- Thin Steaks
- Steak Temperature Ranges
- A Note on Cooking Times
- Simple Live Fire Menu Idea
- How to Grill Steaks Over Live Fire
Article Highlights
- The continued improvement in backyard fire pits that can also be used for cooking makes grilling with live fire more accesible.
- Using wood helps with consistent temperature and embers for heat.
- Using two-zone cooking set up helps to control the rate in which you sear and finish your foods.
What is Live Fire Cooking?
Live fire cooking, or grilling caveman style, is defined as any cooking of food in an outdoor pit using wood (or charcoal or both) that has burned down into embers. Technically live fire cooking is not using active flame to achieve the cooking but instead heat made up of charcoal or embers to cook the food.
This technique is as old as humans and can be found in many cultures, from the Pacific Rim to Africa. Most smokers and grills out there use forms of the technique to achieve flavor and texture.
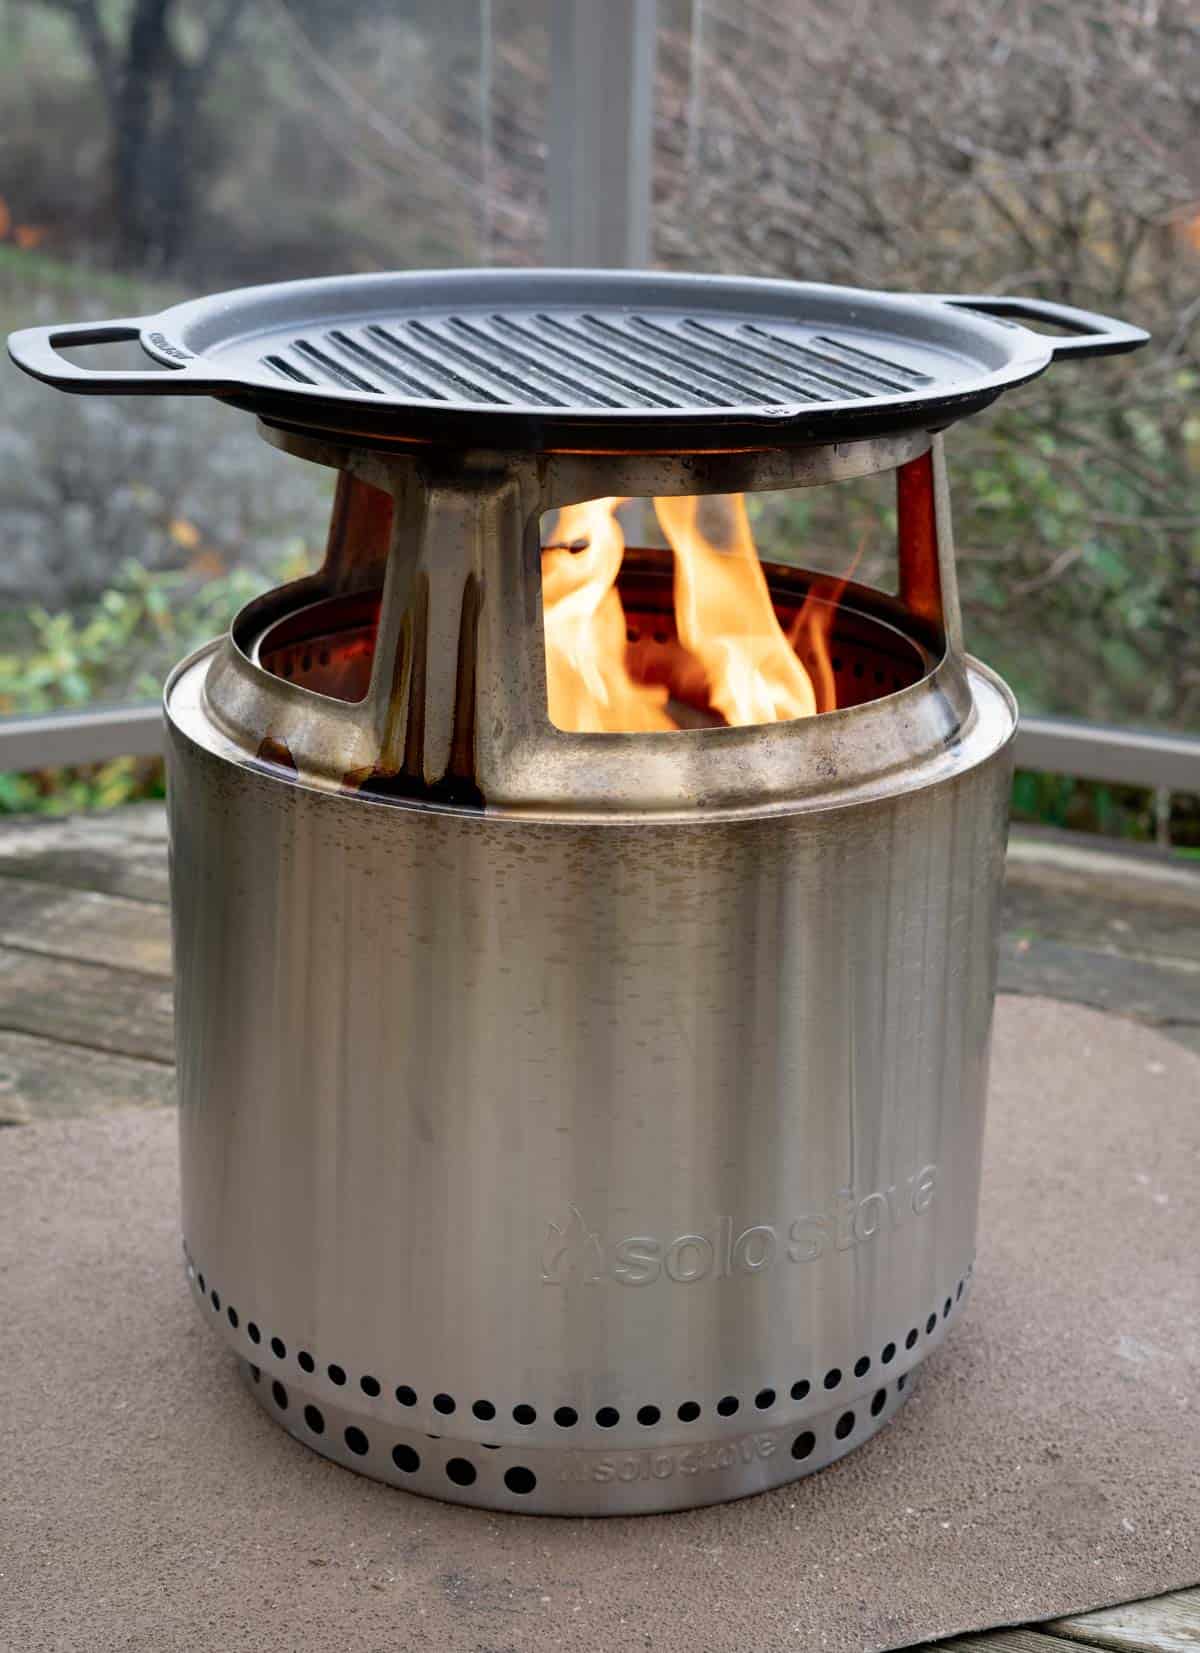
In our case we are using a Solo Stove Bonfire with a grill grate and wood embers to cook the perfect steak. Fire pits of various styles are a great way to learn how to cook with live fire.
How it Works
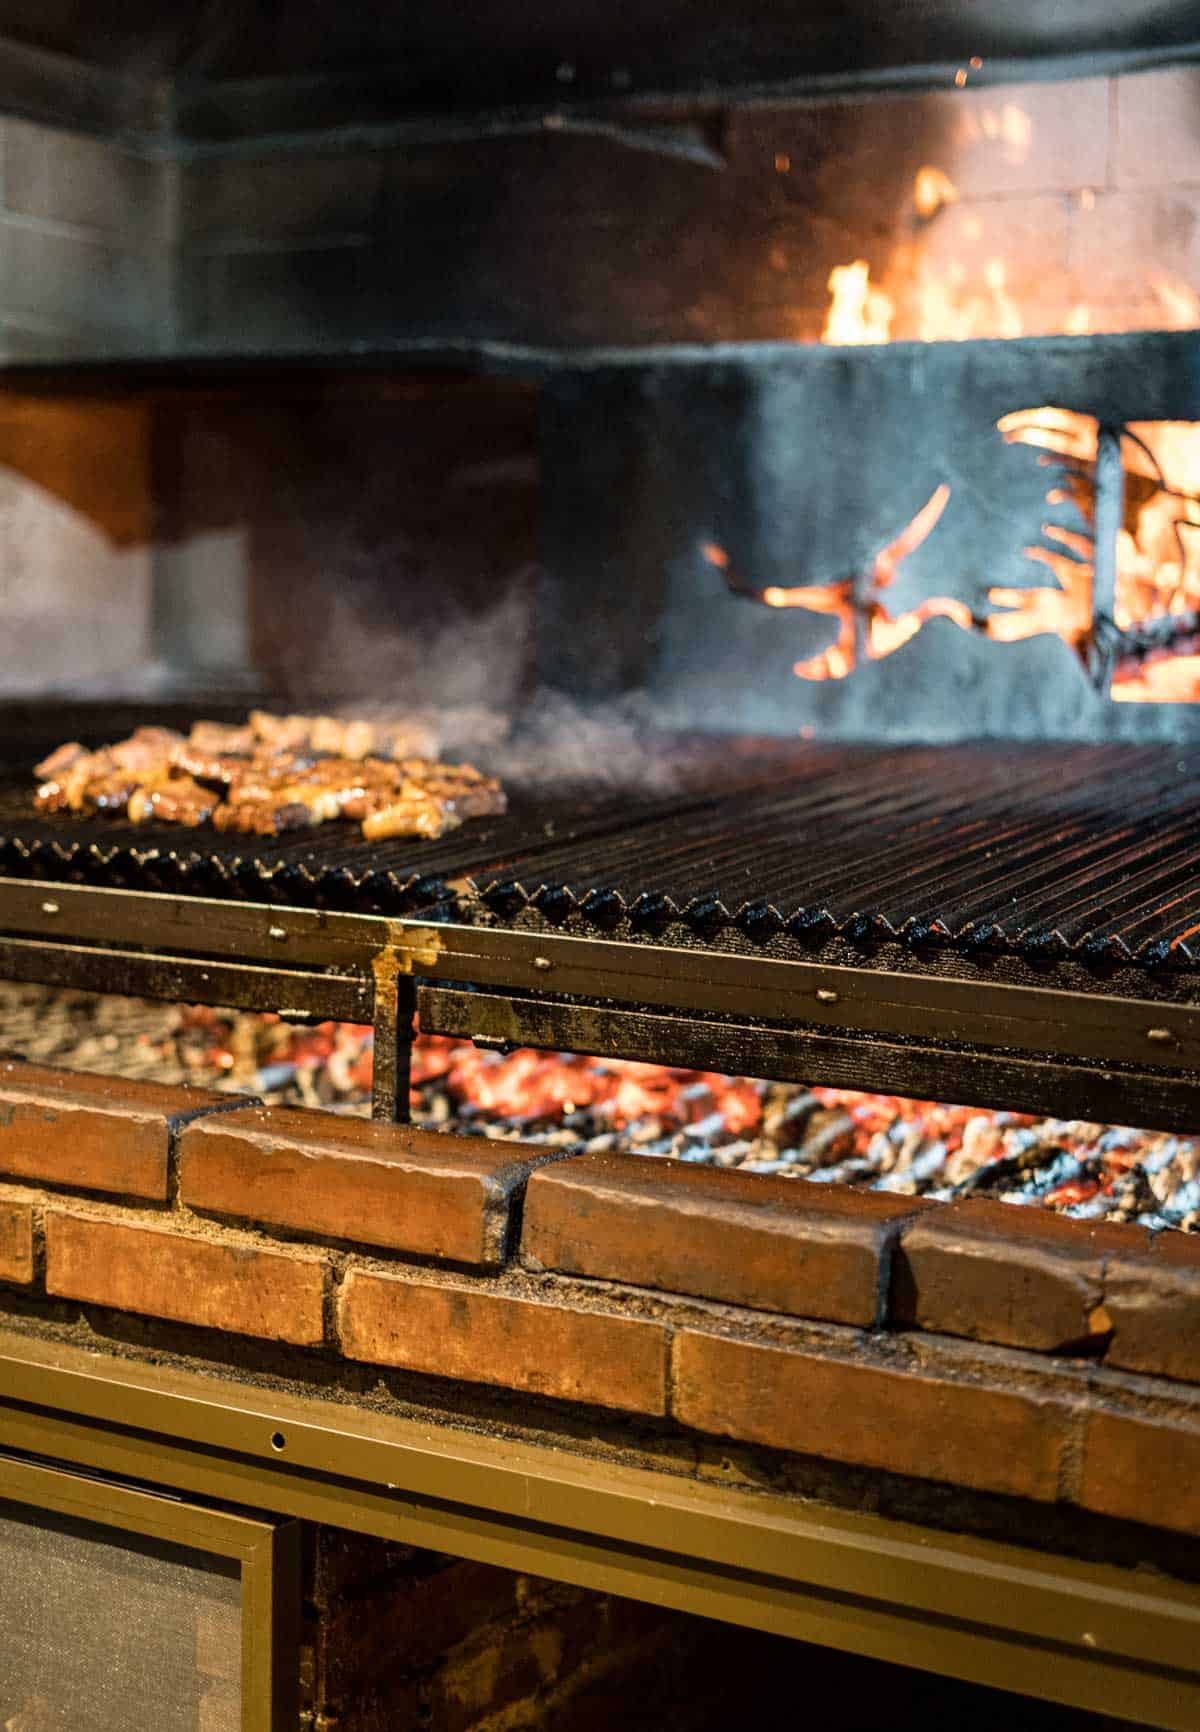
You need a continuous fuel source to provide the heat — that is the charcoal or embers. Often with live fire cooking you have either created the embers from burning wood and cook on the embers, or you have a separate burn pit to create the embers and toss them into your cooker so it’s not actively flaming.
The meat is cooked either direct over the heat source (often called caveman style), hanging above the heat source on a grate or hooks, or indirect on grates or hooks.
The heat will rise from the fuel source and, depending on how far away or close your heat source is, will cook and sear your food. Using indirect heat allows you to avoid a direct sear and allow for foods to finish without the potential for burning.
Tools
- The Pit – Start with the area you will cook in and on. In this case, a Solo Stove Smokeless Fire Pit. You can also use this method in a campfire pit, or even dug into the ground with a grate. We do not recommend live fire cooking with grill grates that are coated in any type of non stick Teflon or non-stick coatings. It’s best to use cast iron grill grates or stainless steel.
- Fuel – Dry hardwoods like oak, cherry, apple, mesquite, or maple are best in splits. The splits burn up and in to embers faster than if you try to burn an unsplit log. You also want a tumbleweed starter to quicken the start of the logs.
- Ash Tool – You will be moving logs and embers around constantly so an ash tool is best to be able to do this, versus a stick or just a rod.
- High Heat Gloves – Lifting logs when they are burning or if you need to pick up cast iron or grill grates means it’s probably hot. Have a good set of high heat gloves that can take 900+ degrees F.
- Long Tongs – Having long tongs is key so you can grab the food and not burn yourself. Alternatively you can use large hooks, but tongs are more practical for most cooks.
- Instant Read Thermometer – A good instant read thermometer, like the Thermoworks Thermapen One, is important to measure the temperature of your steaks and pull them when they are at your desired temperature.
What to Cook Over Live Fire
In short, anything you cook inside can be cooked outside over live fire. It just takes the right tools and practice.
In this case we are grilling steaks in a fire pit. All you need is the right amount of fuel, the right pit or grate, and patience. Oh, and you need to plan.
Meats – All meats are great over live fire. The larger the meat, like roasts, the more you need a set up that has two-zone cooking options given how long they take to cook. Or the grate needs to be able to be moved higher away from the direct heat source.
Vegetables – Any vegetable is great over live fire. Some you can throw onto the embers, like root vegetables such as beets or even squashes. Onions and garlic are also great directly on embers because you can remove the outer edges and still have a soft interior. For more delicate vegetables you can use a grill grate, or skewers, or both to achieve the right flavor and texture.
With Cast Iron you can also make stews, baked goods, or cook anything like you would on a stove top or in an oven.
Planning and Tips
If you plan to make multiple items over live fire then you need to plan the cook first and be sure your prep includes everything you need to get the food out at the same time.
- Keep the menu simple. Overly complicated dishes can go south fast. Write out the menu so you can confirm you have the tools and the ingredients for prep.
- Make a timeline. Approximate how long you need to cook everything. If you have an appetizer, plus steaks, plus vegetables cooking in the embers then you need about 45 minutes to an hour of cooking time to get all of that done.
- Prepare sauces and seasonings in advance of actually cooking. In true mis en place, it’s important that you have everything prepared BEFORE you start cooking as possible so you can focus on the fire and cooking on the fire.
- Plan how much fuel you need. And then increase it by 50%. Think you can cook it all on 6 logs? Plan for 9. Have more fuel than you plan to use so you don’t run out. Trust us – finishing in the oven is a buzz kill. A canopy helps for snow and rain. And if it’s raining or cold, plan to go through your fuel faster, so plan for even more fuel or start with charcoal.
- Write it all down. Have a written plan including timeline so you can manage the stages of all the cooking.
In addition to planning be sure to check local ordnances to confirm you can cook with live fire outside of your own backyard. This is especially important on beaches or campgrounds. Some beaches require pits, some do not. Certain times of the year open fire cooking is banned due to brush fire danger. So it’s best to be sure if you are doing this on the road that you have researched local ordnances.
Ingredients for Grilled Ribeye Steaks over Live Fire
For this recipe we are keeping it simple.
Would you like to save this?
- Olive oil as a binder for our seasoning.
- Beef seasoning, with a combination of savory and salty flavors.
- Thick cut ribeye steaks. For live fire cooking the steaks should be at least 1 1/2 inches thick so they don’t overcook.
Flare Ups
This recipe uses ribeye steaks which have a fair amount of marbling. As the marbling renders while grilling, the fat drips onto the direct embers which will create flames or flare ups.
It’s unavoidable, but the best ways to minimize them is to minimize the active flame. Use a spray bottle of water and spray when you see flames, or use long tongs to move the steak from direct to indirect to avoid it burning (our preferred method).
How To Grill Live Fire Steaks
- Season Steaks. Coat the steaks in olive oil and liberally apply the seasoning to all sides.
- Prepare Your Embers. Arrange four wood pieces in a log cabin arrangement and place the tumbleweed started underneath. Light the tumbleweed starter and ignite the wood. For longer cooks add more wood if the fire pit allows.
- After 30 minutes add two more pieces of wood and begin setting up the embers and wood in a two-zone grilling arrangement. Be sure your grill grate is added over the fire to pre-heat. The hot embers bring the heat to the cook and grate. As you cook you want to keep the flames low which is why it’s best to have lots of wood set the initial embers.
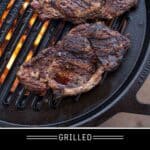
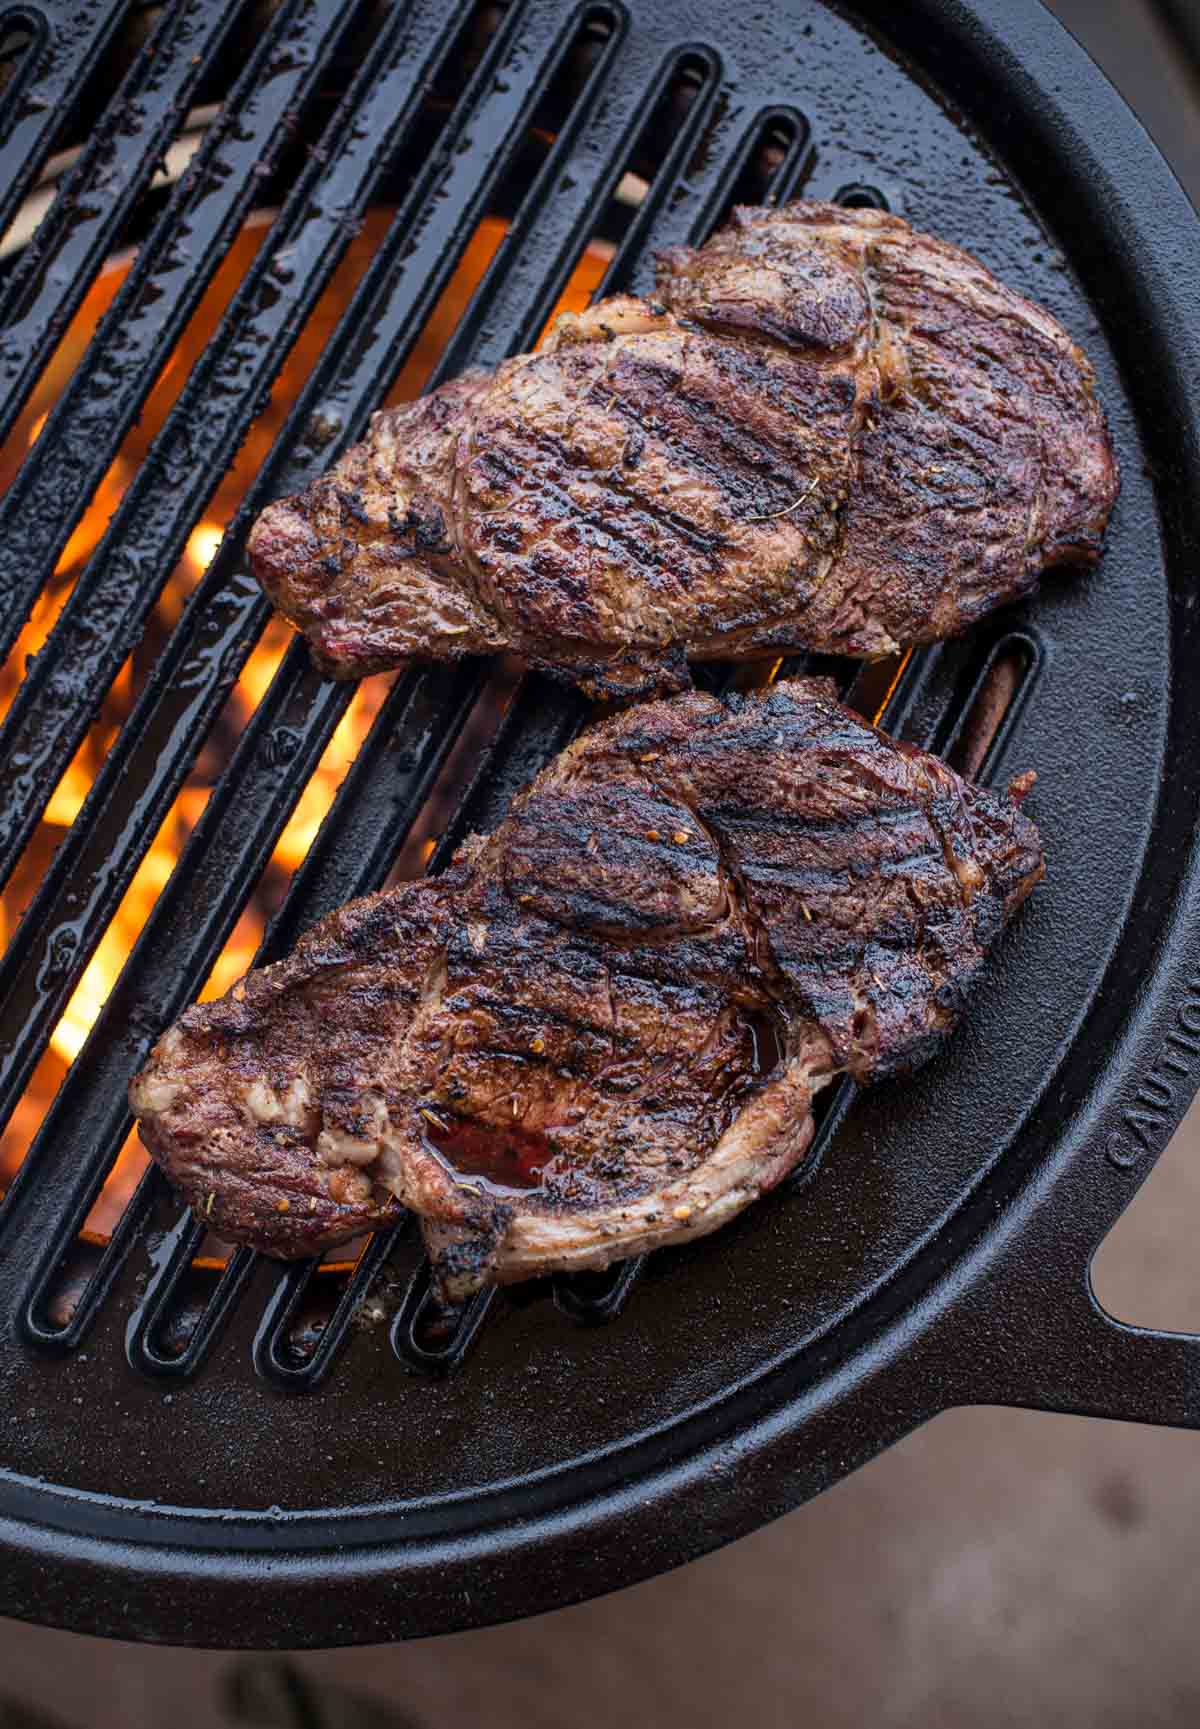
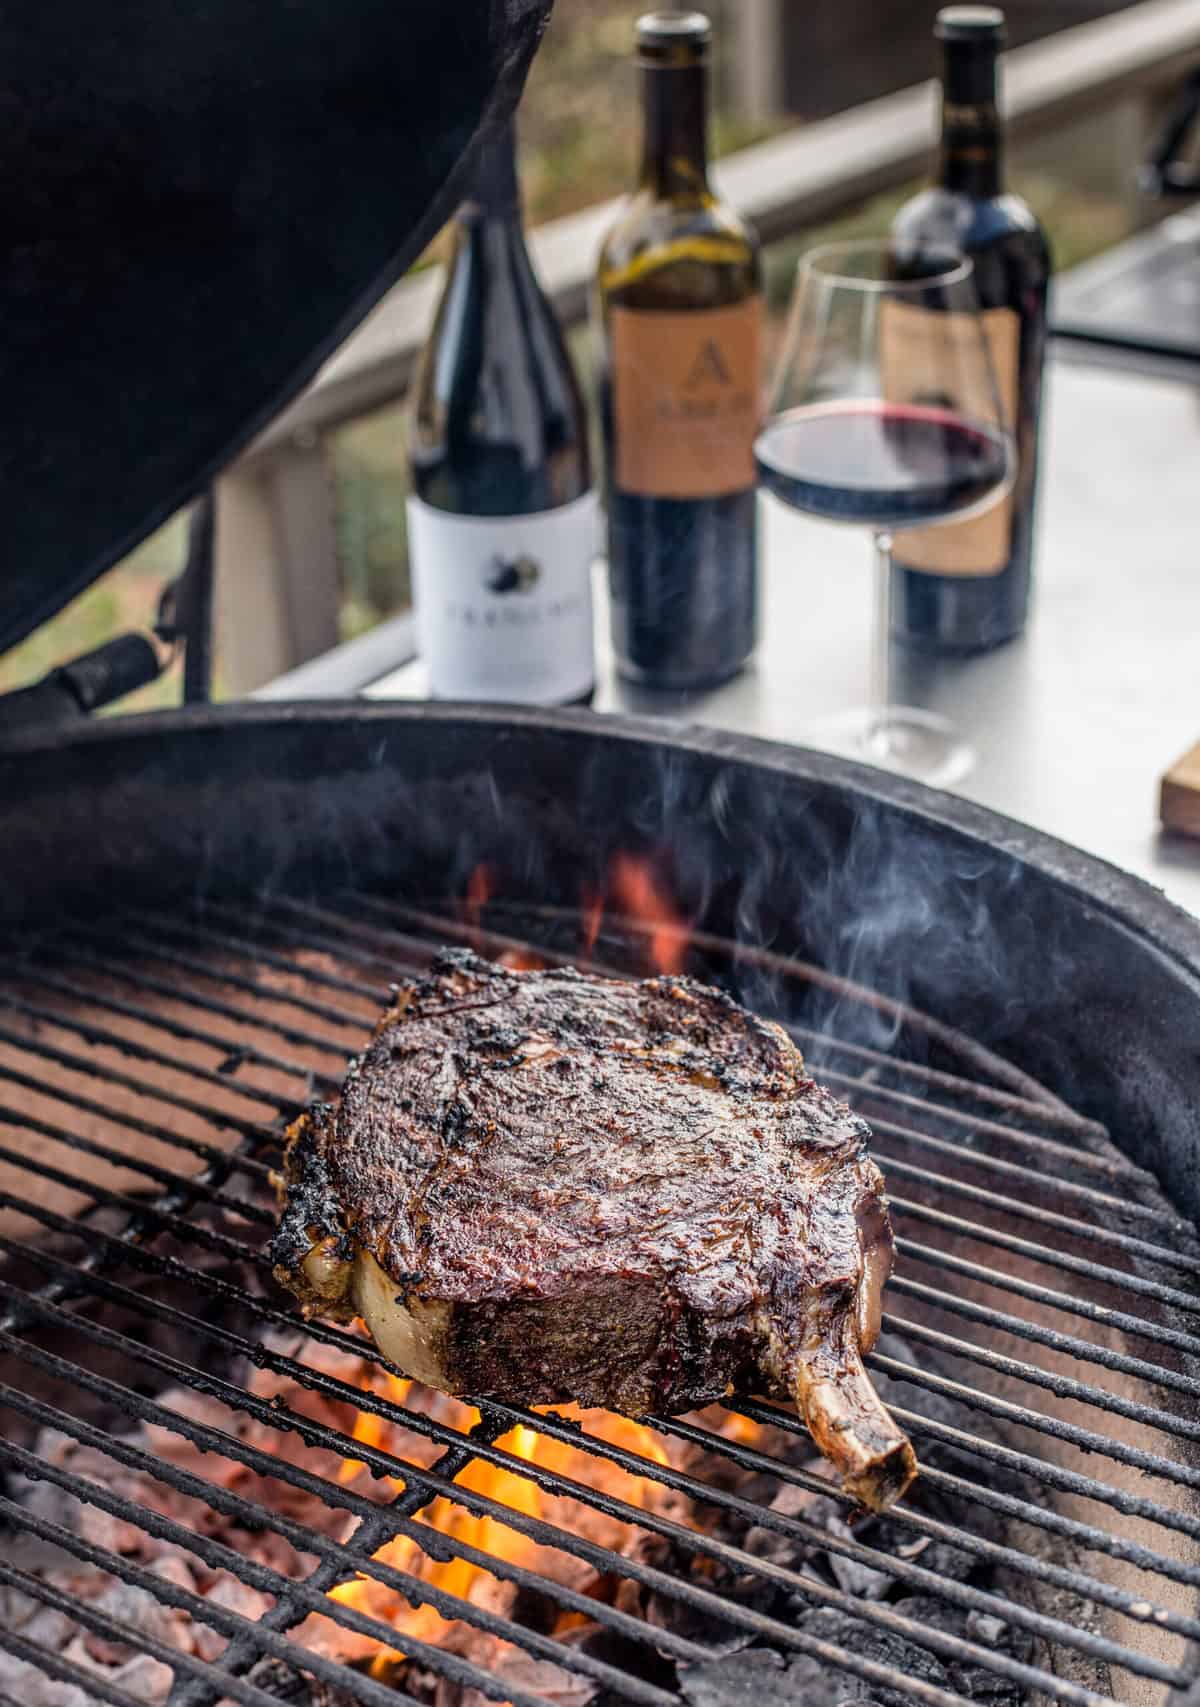
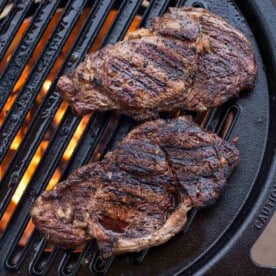
- Grill Steaks over Direct Heat. Place seasoned steak on the direct side of grate over the open coals and grill for 3 to 4 minutes. The grate should be near 500 degrees Fahrenheit for a good sear. After 3 or 4 minutes you should have a nice crust formed, so flip the steak and continue to grill for an additional 3 to 4 minutes over direct heat for a nice sear then move to indirect side. Add another log to the embers to ignite. This will help set up the indirect cooking. See notes about flare ups.
- Grill Steaks over Indirect Heat. After you have seared the two sides of the steak move to indirect side of the grill. The ambient temperature of the embers and the added log and flame will continue to cook. Grill indirect for 4 to 6 minutes and then flip again. Continue grilling 4 to 6 minutes until the steak is at your desired temperature. Unlike a traditional grill with a cover that holds heat, it’s best to flip the steaks while grilling indirect half way through your cook so one side doesn’t over cook. See notes about times.
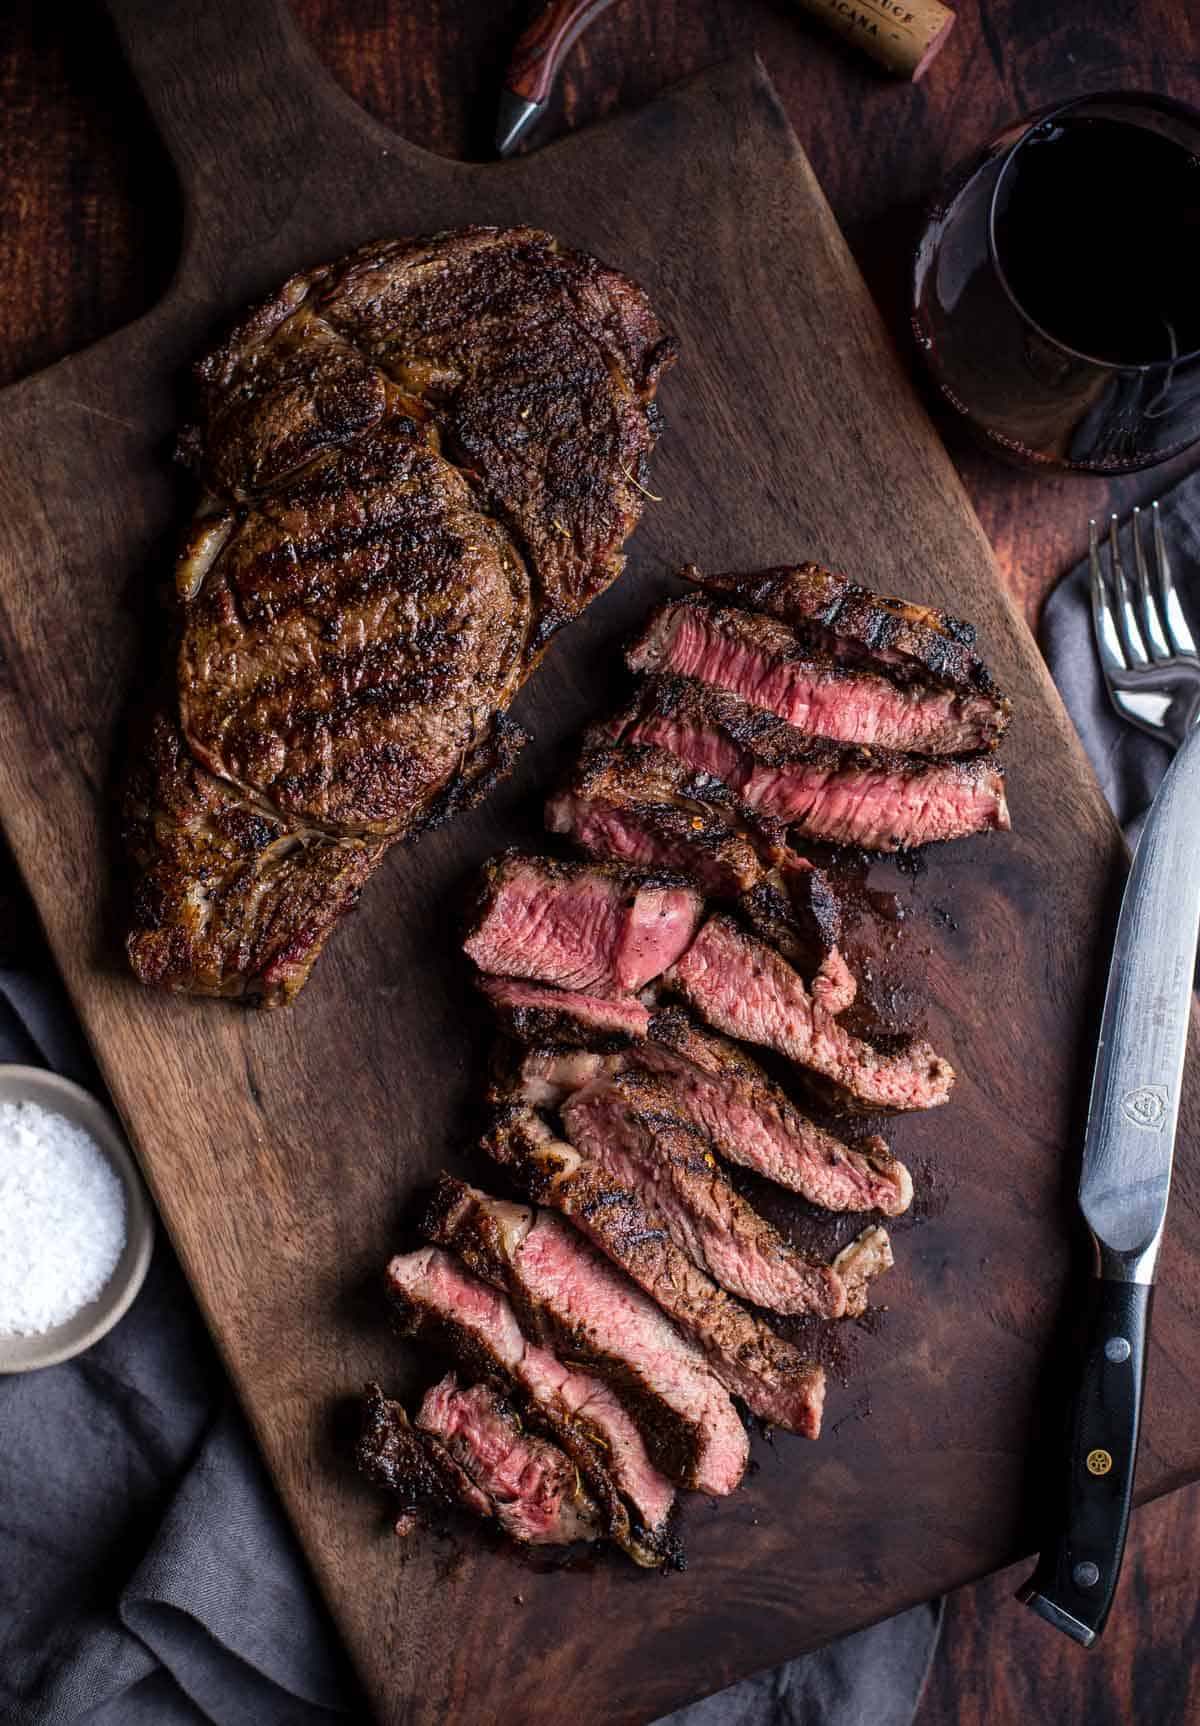
- Remove and Rest. Remove the steaks when they reach your desired internal temperature, then let rest for 10 minutes to allow carry over cooking to finish and allow the cells to start to cool and retain the moisture from the steaks. Slice and serve with your favorite sides.
Thin Steaks
If you have thin steaks then you need to make sure you have high heat. Ideally at 550 – 600 degrees Fahrenheit on the grill. Flip them often and pull at your desired internal temperature. We have more details in our article on how to grill thin steaks.
Steak Temperature Ranges
There is no one definition of what a medium rare steak is, so we use our chef temps as follows for un-ground beef. For more background you can read our guide on the perfect steak temperature.
- Rare – 120 – 130
- Medium-Rare – 130 – 135
- Medium – 135 – 145
- Medium-Well – 145 – 155 (Consider medium)
- Well-Done – 155 + (Not recommended)
A Note on Cooking Times
Always cook live fire steaks to proper internal temperature not to a specific time. This recipe has a rough estimate of how long the steaks will take to cook. Always use a high quality instant read thermometer to pull the steaks at your desired internal temperature.
Things that impact cooking time:
- Wind and environment, light rain will cool down the flame and grate. We do not recommend grilling in heavy rain without a covered patio.
- Account for carry over cooking. The steak will increase in internal temperature 5 degrees as it rests. So if you like your steak at 135 degrees (Medium Rare) pull the steak at 130.
- Steaks vary in marbling and size, the leaner the steak the faster it will cook. The fattier the cut the more flareups you can expect.
Simple Live Fire Menu Idea
You can use any of our grilled recipe ideas for the main course. You can also do this with grilled pork chops too.
- Appetizer: Grilled Brie with Wine and Time served with crostini. This is perfect to make as the embers are getting hot.
- Main: Grilled Steaks as noted in this recipe. We use Ribeyes but you can use any thick cut steak, from Porterhouse, to NY Strip, or even Pork Chops.
- Side: Grilled Broccolini with Grilled Lemon and parmesan cheese. This is perfect to make as the steaks are finishing over indirect heat (they cook quickly over direct heat).
- Salad: Grilled Romaine Caesar Salad – Make the dressing in advance and then toss with the grilled romaine.
- Dessert: S’mores are perfect at the end (if you are still hungry).
- Don’t forget the wine! Want to know what to serve with steak? Check out this post.
Tried this recipe? Give us a star rating and we would love to see! Mention @vindulge or use the hashtag #vindulge on all the social media handles. And consider subscribing to our newsletter where we drop all our favorite ideas and inspirations weekly.

Get a signed copy of our cookbook! Order Now
About Vindulge
Mary (a certified sommelier and recipe developer) and Sean (backyard pitmaster) are co-authors of the critically acclaimed cookbooks — Fire + Wine and Fire + Wine Backyard Pizza — and have been creating content for the IACP-nominated website Vindulge since 2009. They live in Oregon on a farm just outside Portland.
How to Grill Steaks Over Live Fire
Equipment
- 1 Open Fire Pit (We cooking on the Solo Stove Bonfire with Hub and Grill Grate)
- 1 Pair Long Tongs
- 1 Heat Resistant Gloves
Ingredients
- 8 pieces cooking wood
- 1 piece tumbleweed fire starter
- ¼ cup beef seasoning
- 2 tablespoons Extra virgin olive oil
- 2 Thick (1 1/2 inch) Ribeye Steaks
Instructions
- Season Steaks: Coat the steaks in olive oil and liberally apply the seasoning to all sides.
- Prepare Embers: Arrange four wood pieces in a log cabin arrangement and place the tumbleweed started underneath. Light the tumbleweed starter and ignite the wood. For longer cooks add more wood if the fire pit allows.
- After 30 minutes add two more pieces of wood and begin setting up the embers and wood in a two-zone grilling arrangement. Be sure your grill grate is added over the fire while it pre-heats. The hot embers will heat the grate. As you cook you want to keep the flames low which is why it's best to have lots of wood set the initial embers.
- Grill Over Direct Heat: Place seasoned steak on the direct side of grate over the open coals and grill for 3 to 4 minutes. The grate should be near 500 degrees Fahrenheit for a good sear. After 3 or 4 minutes you should have a nice crust formed, flip the steak and continue to grill for an additional 3 to 4 minutes over direct heat for a nice sear. Add another log to the embers to ignite. This will help set up the indirect cooking. See notes about flare ups.
- Finish Over Indirect Heat: After you have seared the two sides of the steak move to indirect side of the grill. The ambient temperature of the embers and the added log and flame will continue to cook. Grill indirect for 4 to 6 minutes and then flip again. Continue grilling 4 to 6 minutes until the steak is at your desired temperature. Unlike a traditional grill with a cover that holds heat, it's best to flip the steaks while grilling indirect half way through your cook so one side doesn't over cook. See notes about times.
- Remove and Rest: Remove the steaks when they reach your desired internal temperature as noted with a good instant read thermometer, then let rest for 10 minutes to allow carry over cooking to finish and allow the cells to start to cool and retain the moisture from the steaks. Slice and serve with your favorite sides.
Notes
- Rare – 120 – 130
- Medium-Rare – 130 – 135
- Medium – 135 – 145
- Medium-Well – 145 – 155 (Consider medium)
- Well-Done – 155 + (Not recommended)
- Wind and environment, light rain will cool down the flame and grate. We do not recommend grilling in heavy rain without a covered patio.
- Account for carry over cooking, the steak will increase in internal temperature 5 degrees. So if you like your steak at 135 degrees (Medium Rare) pull the steak at 130.
- Steaks vary in marbling and size, the leaner the steak the faster it will cook. The fattier the cut the more flare ups you can expect.
Nutrition information is automatically calculated, so should only be used as an approximation.